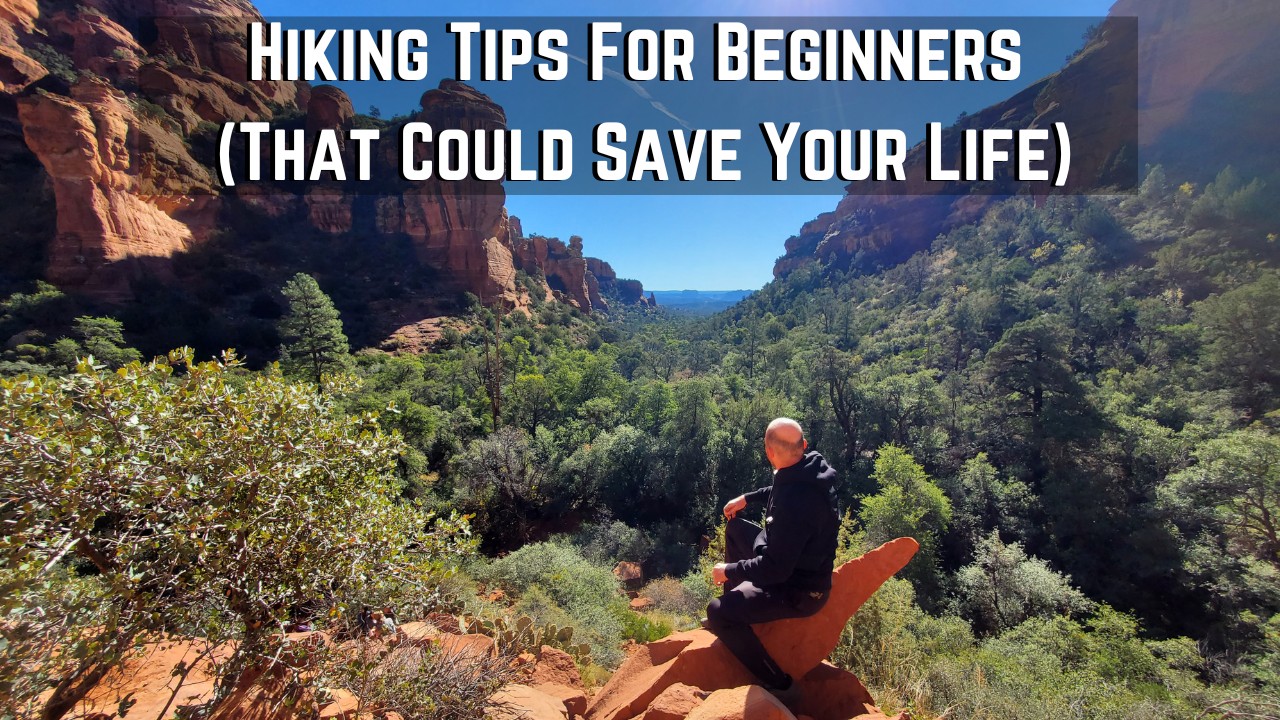
13 Hiking Tips For Beginners (These Could Save Your Life)
Most hiking tips for beginners you read about from other sites give you very basic (but necessary) information about how to have a safer, better time on the trails.
And while I do recommend checking out those articles for the variety of tips, I like to think this one is different and in some ways better and here’s why:
- I don’t consider myself an expert hiker, but I’m far from a beginner and have hiked trails many experts wouldn’t do.
- I focus on finding incredible hiking trails instead of the boring walk in the woods ones.
- I’ve taken numerous beginners on hikes with me and everyone has been extremely happy with what I show them.
- I like getting more value and variety out of my hikes, meaning more views, more adventures, nothing boring.
- For this post, I am focused on providing tips on finding beginner level hikes with amazing value for beginner level hikers.
If that vibes with you, then the 13 hiking tips for beginners I have to share with you are going to help you have better (and safer) experiences because believe me, I had to learn many of the lessons/tips the hard way.
Here are the 13 hiking tips for beginners:
- Only hike easy, popular trails (for starters)
- Better fitness = better hiking experiences
- Avoid hiking alone when you’re a beginner
- Hike where cell phone reception is good
- Use Alltrails Pro ideally
- Understand how elevation gain determines the difficult of a hike
- Start your hikes early if you can
- Use trekking poles
- Bring the following items on any beginner level hikes
- Wear specific gear on any beginner hikes you do
- Know what kind of weather to expect on your hikes
- Research your hike (and nearby ones) before you go
- Try to do multiple, but short hikes in one day to mix it up
1) Only hike easy and popular trails for starters:
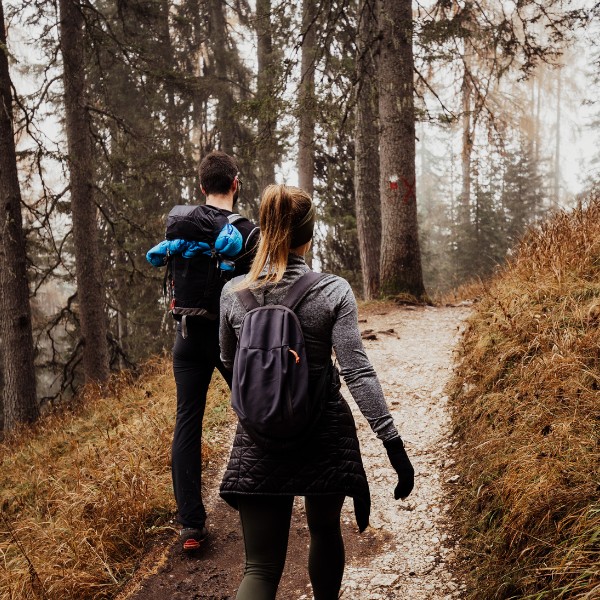
This is the most important hiking tip for beginners I want to share with you and that’s why it’s #1 on the list! When you’re a beginner hiker, it’s much better to focus on exploring simple, short, fun and popular trails. Normally I’m not a fan of seeing a lot of people where I hike, but in this case it’s a welcomed thing because you have less chances of getting into trouble like getting lost in the woods.
When you’re hiking simple trails with many people, it’s a much more calming experience because if something goes wrong, you will have people who can help and it makes you feel safer in general (because that is actually true). I would absolutely avoid long hiking trails, overnight trips (camping) and things of that nature when you’re just a beginner. Here’s an example of what a short, simple hike looks like to me:
- The trail is very easy to see and follow.
- You see a lot of people on it.
- There are clear trail markers to see.
- It’s a popular trail families, groups, beginner hikers and inexperienced people often do successfully.
So the next question regarding this tip is, how do you find easy, short and popular trails?
Aim to do hiking trails that are under 5 miles long for starters. And when it comes to that, here’s what you need to know:
There are generally 3 different types of trails you can encounter:
- Loop trails which means you start at point A and go in some sort of circle/s and then return to point A, never going back the same way (unless you want to). Good for beginners.
- In and out trails where you start at a Point A, work your way to the end of the trail, then backtrack to Point A. Also good for beginners.
- Custom trails (advanced) where you take several trails in a park you’re exploring and make a loop/s, or in and out trail out of it, meaning you will cross several trails, but merge them together for your goal. For example, I do this when I hike at Harriman State Park. I would NOT recommend you do this if you’re a beginner hiker because it’s very easy to get lost.
2) The better fit you are, the better your hiking experience will be:
I can’t tell you how many beginner hikers I come across when I explore places that just had no clue how difficult the hike was and a huge part of that is not knowing ahead of time what kind of elevation you’re going to be on, but that’ll be a tip later on in this post. The point of this tip is to help you understand how to train for hikes so you don’t run out of breath, get cramps or worse not be able to even finish your hike and require a rescue operation of some sort.
When I train for hikes, here is what I typically do (at the gym):
- Weight lifting, this is great for having to carry backpacks and weights on your hikes.
- Stair master exercises.
- Just hiking in places and letting that help you prepare.
- Lower back muscle workouts.
- Elevated treadmill walks (basically a regular treadmill, but you can lift it to an angle to make it harder to walk on). This is great for practicing for incline hikes.
I’ve come across so many hikers who just see people walking in the woods and think it’s as simple as walking in the city, but it’s nothing close to that and it’s why hiking is such a complete lower body workout and this also raises another important point about fitness:
Make sure you are flexible. Here are stretches and things I do before, during and after hikes:
- Foam roller exercises for the thighs and legs are huge.
- Stretching your calf muscles is another major thing you need to do.
- Know how to stretch your lower back too (dog and cat poses help).
When you’re hiking, the longer it goes on (and the hotter it gets), the sooner you’ll start to feel tightness and cramps, specifically in your legs and lower back areas since they are most affected. Know how to take breaks and stretch those areas out during your hikes too!
3) Avoid hiking alone when you’re a beginner:
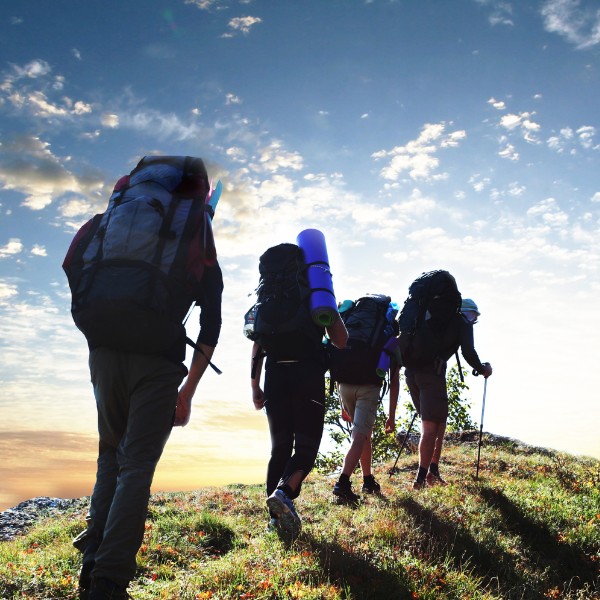
Unless you’re hiking alone but in a popular trail where it’s common to see people, I would recommend you go with at least one other person. Groups are better but you should make sure the people you go with are actually fit and enjoy hiking.
One of the worst things you can have is people who are not into hiking slow you down on a trail, which also makes the experience worse for everyone so if you do go in a group, make sure everyone enjoys it and you will if you have a good group of people to go with (better shared experiences).
Whenever you hike alone as a beginner, it’s easy to lose your calm if something goes wrong and there’s no one else around (I speak from experience, trust me on that). I personally hike alone these days because I’m advanced and like to explore very long and difficult trails (we’re talking 20 mile day hikes with 5,000+ elevation gains at times), but at the same time, I still make sure to hike in places where I know I’ll run into people just in case.
4) Hike where cell phone reception is good (ideally):
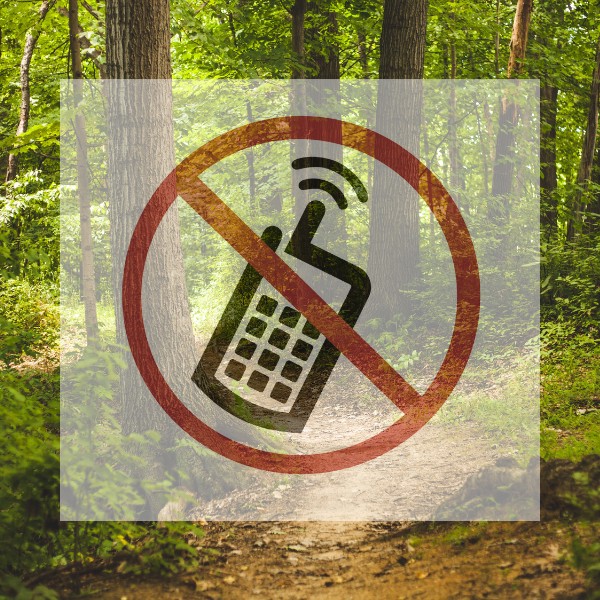
This may seem like an obvious hiking tip for beginners, but once you start actually exploring trails, you’ll quickly see how flaky your cell phone reception can get and it’s something that happens often so don’t let that scare you.
The good news is that cell phone coverage and reliability has gotten and better over the years but it’s never 100% certain that it will always be good when you’re hiking. Additionally, the higher up you go in elevation (let’s say you hike up a big mountain), the better your reception gets, whereas if you are in some sort of canyon deep in say Utah, don’t expect a good connection (see Wire Pass Trail for an example as there is no connection there).
I shouldn’t have to explain why having cell phone reception is good to have on a hike, but don’t expect it to be 100% there when you go. One of the backup plans if and when that does happen is to be in an area with other people and areas where you can go back to the starting point so it’s easy to return home if you need to.
Another big thing about cell phones: Always let someone you know that’s reliable where you’re hiking just in case. Check in with them when you get to your hike and make sure to let them know when you finish the hike.
Many trails also have check in boxes at the trailhead where you can enter your name, info and the time you start the hike. I would also recommend filling those in when you do your hikes.
5) Use Alltrails (Pro version ideally):
In recent years great hiking apps have emerged that help make hiking a lot easier and safer and the most popular out of the options out there is Alltrails. It’s free to download but there is an upgrade called Pro. Before I explain the reasons why I recommend this app, specifically using the Pro version, let me explain why this app is good:
It helps you find beginner friendly hikes in your area (provides lists of trails, reviews, difficulty levels and tips from users who have hiked it).
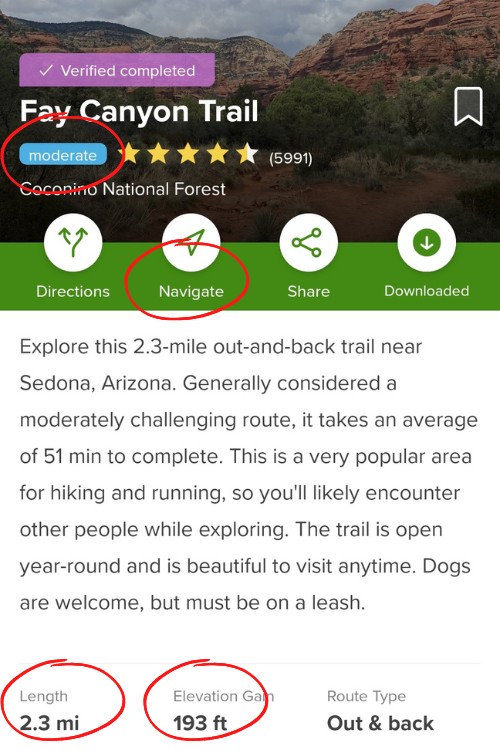
Here’s an example (of the free version benefits): I’m looking to do the Fay Canyon trail in Sedona which I can find on Alltrails. Based on this simple report, I know the following:
- It’s a little over 2 miles.
- It’s moderate.
- The elevation isn’t that high.
- I can read other people’s reviews of it (get tips, know what to expect).
- I can even pull up a free map to see the trail (and where I’m on it if I have reception).
The Pro version of Alltrails is $29.99 a year and the biggest benefits it has is that you can download those maps and use them IF your cell phone loses connection and this means you can literally see where you are in real time on the map regardless if you have a signal or not.
Trust me when I say you don’t want to be lost on a trail with no cell phone reception or a map to figure out where you are. I’ve found that to be amazing and while I do encourage you to do easy, beginner friendly hikes, you never know if a situation might arise where you go off trail.
6) Understand how elevation gain determines hiking difficulty:
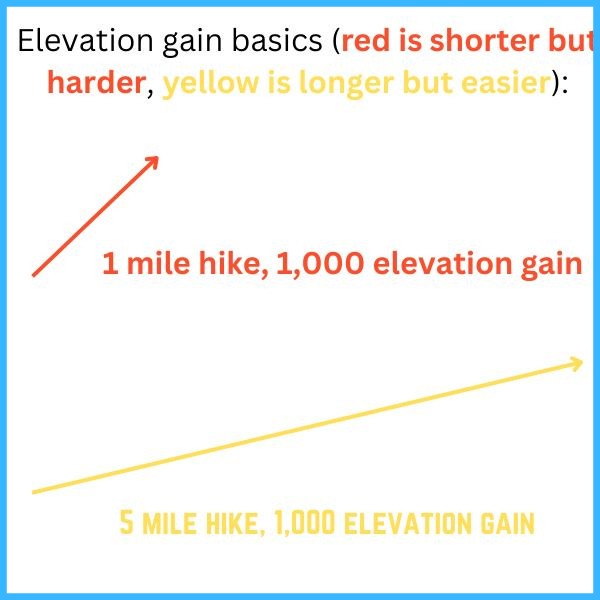
Most people have no idea what or how important elevation gain plays a role in the difficulty of the hike you do, so let me ask you a quick question about that:
Which hike do you think is more difficult? Is it:
- A 10 mile hike with 200 feet of elevation gain.
- A 1 mile hike with 1,000 feet of elevation gain?
The answer is 2 because the length of a hike is secondary to judging it’s difficulty. Elevation gain is what really matters and the second option would be the hard hike because you’d basically be climbing here and using your entire body to pull yourself up. That’s why the easier hike is the first one.
Elevation gain and the difficulty of the hike is also determined by the length of that hike and that means that:
- A 5 mile hike with 1,000 feet of elevation gain is hard.
- A 10 mile hike, despite being 2x as long with 1,000 feet of elevation gain is moderate.
The bigger the elevation gain and the shorter the hiking distance, the more compact and harder the hike is and the bigger the elevation gain but longer the hike it, the more that elevation is stretched out and easier to manage.
Apps like Alltrails will help you see the elevation gain to determine if you should do it or not.
7) Start your hikes early:

Unless you’ve been to a hike more than once and know what to expect, don’t go thinking that if it’s a 5 mile hike that it’ll take you 3 hours to do. Always expect hikes to take longer than you think they will. When I do hikes, it’s typically as early as I can because I always expect 3 things:
- First, life has taught me that hikes take longer than you expect (usually).
- Second, if I start a hike early, I have more daylight meaning its easier to navigate.
- Third, if I do finish the hike earlier than I wanted, I can still check out other spots and do more.
Yes you’ll need to wake up earlier in the morning, but it’s worth it for your safety and having a better time. Also seasonal hikes affect this as in the spring and summer, you will have more daylight than in the fall and winter.
- So if I were doing a 5 mile hike in the spring and summer, I could start it around 9 am.
- If I were doing the same hike in the fall and winter, I would want to start it at 7 am!
8) Use trekking poles:
The health benefits of trekking poles are incredible and an amazing asset to bring with you on almost any hike you do. They basically help reduce the stress on your legs and knees and allow you to hike longer distance with less difficulty. The trekking poles I use, which are the Trailbuddy Trekking poles are pretty cheap, but amazingly reliable and have saved me many times on hikes, especially when I was either tired or even injured.
Here’s some cases of that:
1) I was hiking in Breakneck Ridge when it was very hot and humid (worst kind of weather to hike in) and these trekking poles felt like someone was always pulling me up when I was feeling drained and exhausted.
2) I was also hiking in the Grand Canyon after suffering a massive injury in my sciatica areas and if it weren’t for these trekking poles, I don’t think I would have gotten out of the Grand Canyon that day.
9) Bring the following items on any beginner hikes you do:
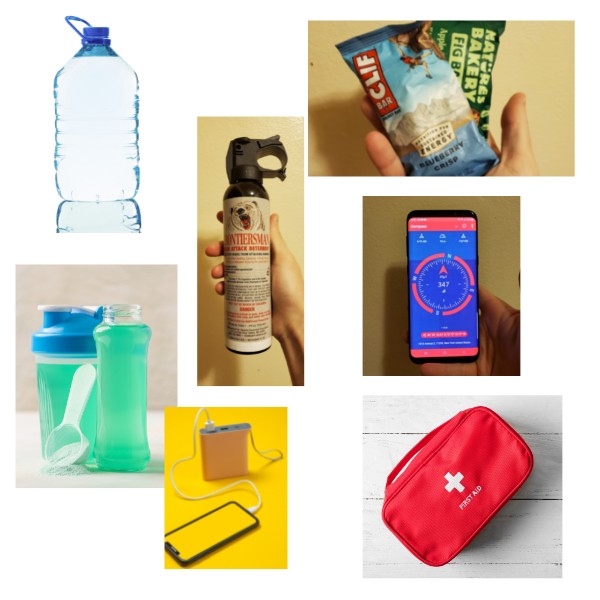
The following items are good for 5-10 mile hikes (beginner level):
- 1-2 liters of water is a must (warmer weather = more water).
- A Lifestraw is an excellent thing to have on any hike (it filters water).
- 2-3 energy bars (300 calories or more each).
- Some sort of energy mix (I use the pH Miracle pHour salts).
- Possibly an energy drink if you can hold it.
- Bear spray if you know the area you’re hiking in has them.
- Map of the hiking area (not just on Alltrails or on your phone).
- A compass app or physical compass just in case.
- A device to charge your phone just in case (start hikes with a 100% charge on a phone).
- Some sort of first aid just in case (bandage, antiseptic product).
- See more of what to bring on a hike.
At the same time, pack lighter if you can while having these items.
A bigger, heavier backpack makes it tougher to hike, but these things shouldn’t put more than 5-10 extra pounds of weight on you.
10) Wear this specific gear if you can on the hikes you do:
I always recommend basic things regardless of it the hike you do is short or long, namely:
- Decent hiking shoes (or trail runners).
- Hiking poles really come in handy in case you get hurt or tired.
- A backpack that can hold more than you need (food, snacks, water, portable charger).
- Wear clothes that cover your body too when hiking especially in places where tick bites can happen. I would not recommend hiking in jeans or wearing crocs on hikes!
11) Know what kind of weather to expect on your hike:
Depending on where you’re hiking, the weather can either be calm or completely unpredictable. For example:
- When I explore hikes in Utah, most of the time it’s sunny and pleasant.
- When I explore hikes in the Catskill Mountains, I find that if the weather report says it’ll be partly sunny, it rains and when it says it’ll rain, it’s usually partly cloudy.
That’s because mountain weather is way more unpredictable than desert weather but in any case, use simple Weather apps to check what the conditions or forecast of the place you’re going to is. However, know that a forecast of weather in nature is usually not very reliable and ideally you should do it the day before or on the day off since it can change on that day.
- Also if you expect rain, see this post on what to wear when hiking in the rain.
- Another good one is what to wear when hiking in the cold.
As for hot weather, make sure to wear a hat and avoid hiking when it’s humid and hot too. That is one of the worst times to go hiking in my experience.
12) Research your hike before going:
Unless you are really experienced at impromptu hiking and can quickly figure out where to go and what to expect, don’t go into any hike before researching it first! That means:
- Using apps like Alltrails.
- Googling the hike to see reviews, tips and pictures.
- Having a map of the area just in the case.
- Knowing what the weather is likely to be (weather conditions and temperature).
The point is when you figured out what hike you’re going to do, you need to have a basic picture of:
- How long it’ll take you to get there (so you can start as early as necessary).
- A pretty basic idea of what you’ll be doing.
13) Try to do multiple, short hikes in one day:
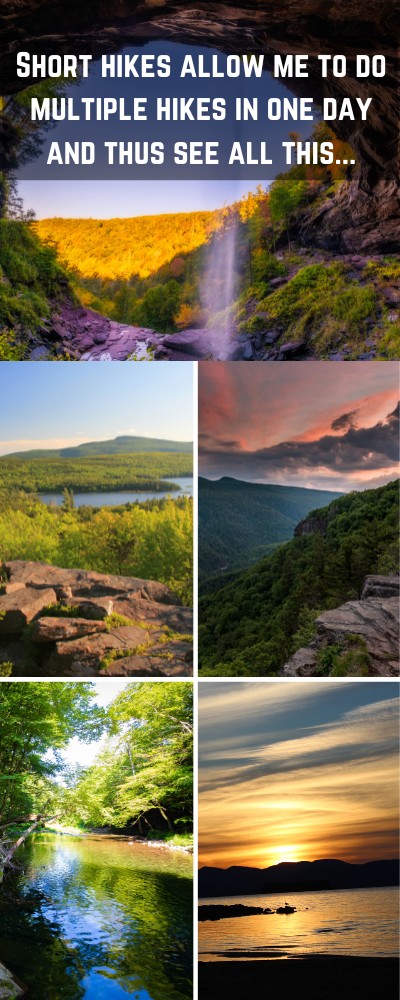
I don’t recommend beginners do long day hikes in general until they are ready, but if you’re doing to do a short hike and you finish early, there’s still a lot of time left to do more, and so what I personally like doing when I show beginner hikers around is to explore several places in an area to make the most out of it.
Exploring short hikes in one area is great for mixing things up, seeing more diverse nature, and just getting out of your day hike than a regular walk in the woods and then you go home! Here’s an example:
Sometimes I’ll do a day hike with people to the Catskill Mountains and here’s how my itinerary will go:
- I’ll start with a simple hike to Kaaterskill Falls (1/4 miles).
- I’ll follow that up with a hike through North South Lake (2/4 miles).
- I’ll show people around another waterfall hike and Catskill swimming hole I like to enjoy.
- That’ll usually be enough to fill up the day.
In doing this, I am able to show people waterfalls, beautiful trails, lakes, a swimming hole to finish things up and it gives people a lot of variety vs someone just saying “Well we took a nice walk in the woods and that was it”.
I don’t like that. I like adventure and this is a great beginner friendly way to do it.
If you plan to do this too, research your main hike and get that over with as #1, then if there’s a lot more time left over, do another hike nearby if it’s possible but if you have 1-2 hours left of daylight, don’t risk it. Instead fill up the remaining time with things like this:
- Scenic overlook areas which you can stop your car at and enjoy.
- A right off the road waterfall hike which doesn’t take a lot of time. You can see my waterfalls near me post for details on that.
This way you can mix it up too without risking daylight being gone. I’ve mastered doing this very well no matter where I am and via impromptu methods, but you should plan ahead if you are going to do this and as you get better, maybe shift to impromptu ways of doing it later.
A quick mention of camping and why it’s not included here:
Camping seems to be very synonymous with hiking but in my personal experience and opinion it isn’t. Hiking is you actively exploring the woods. Camping involves staying overnight outdoors (and having to carry more stuff).
I personally dislike camping (a lot) and there are other good sites which give you good beginner tips on camping like this one here. Me personally, I like day hikes and then either going home or sleeping in a nice hotel which is why these tips are much more geared towards hikers than campers.
If you have any questions on these tips or other suggestions from your own experiences, I’d love to hear about them below!