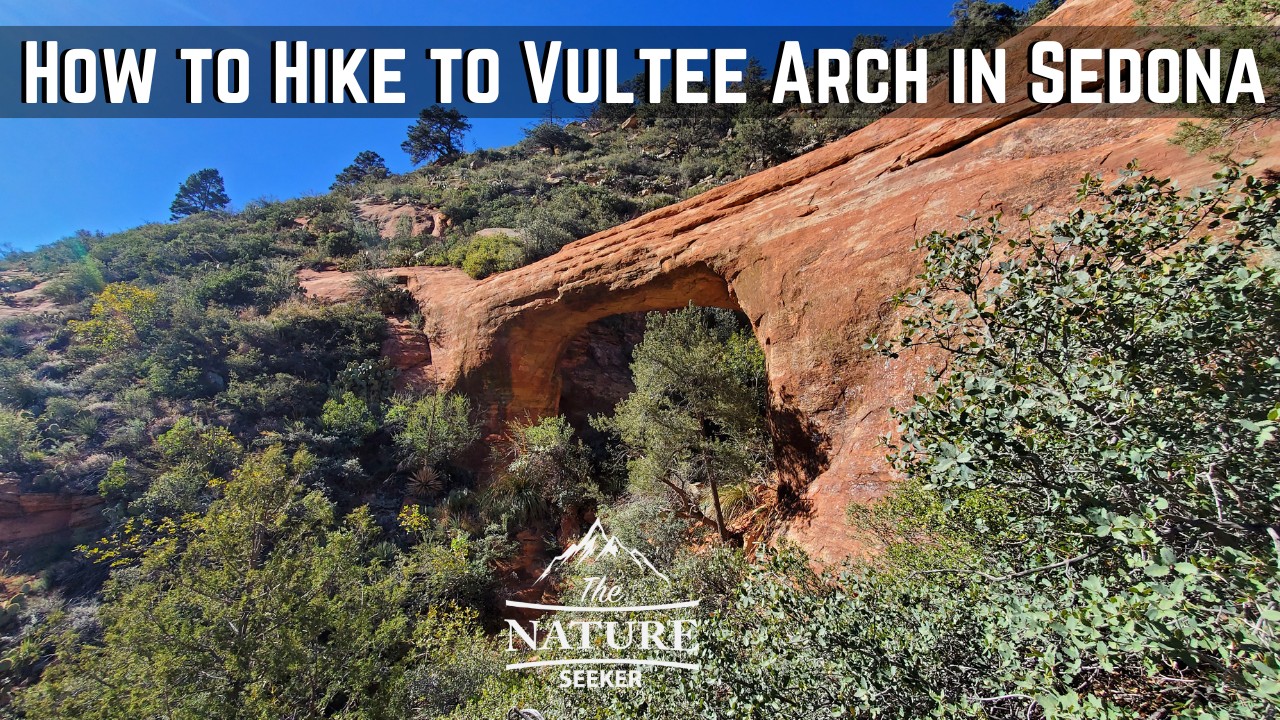
How to Hike to Vultee Arch in Sedona Without Getting Lost
In this post, I’m going to share with you how to hike to Vultee Arch in Sedona which is something I recently did and very much enjoyed.
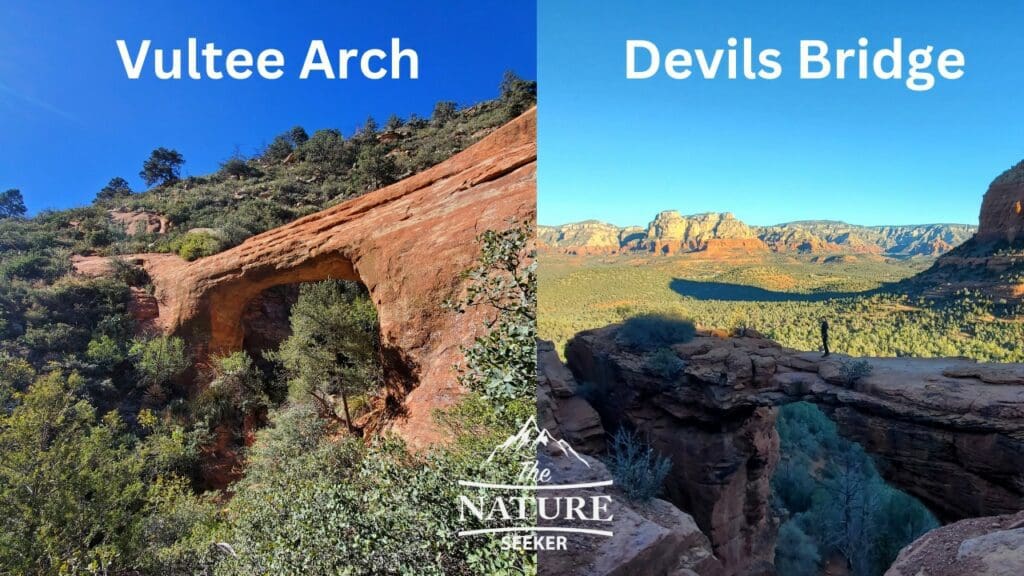
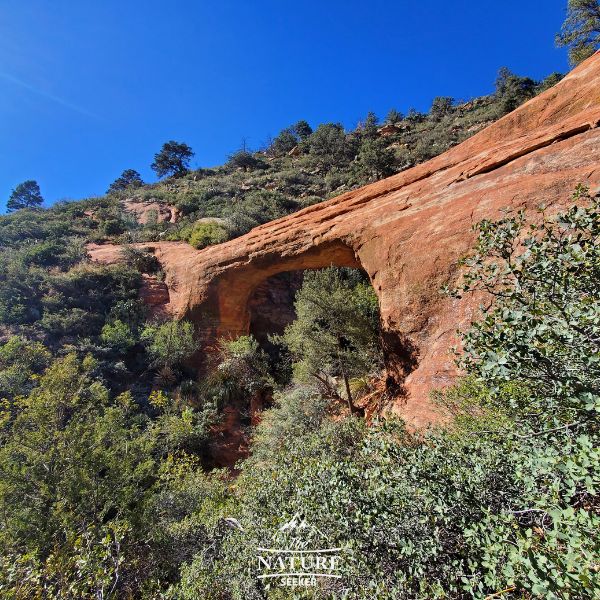
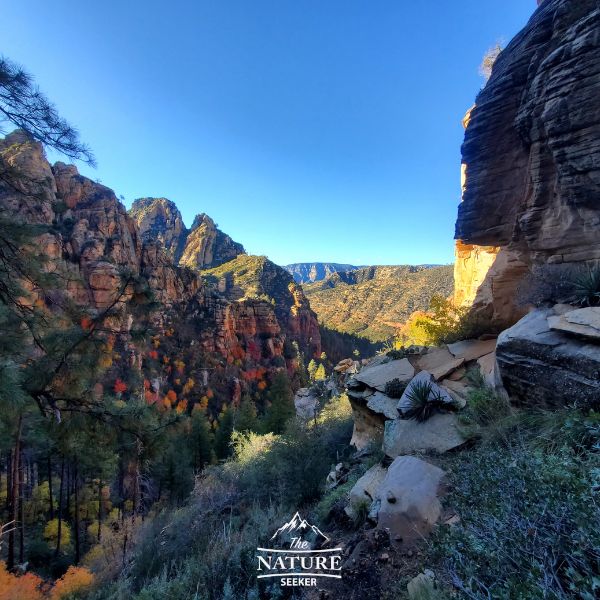
Vultee Arch is an excellent none crowded hike to check out and it’s also not far from the popular Devils Bridge which most people do when they visit Sedona. However, while Devils Bridge is ridiculously crowded and difficult to access because of that, Vultee Arch is just as scenic (and more so in my opinion), you can also walk on top of the arch and the hike to get to it is way better than Devils Bridge (I’ve done both these hikes so I speak from experience).
There are 3 main ways to reach Vultee Arch and before I explain what they are (each has it’s pros and cons), let me first give you a simple breakdown of this hike:
 The first option to hike to Vultee Arch is “technically easier” and that’s because there is an option A and B to do it. Here’s how it works:
The second option is your fallback plan if you don’t have a high clearance vehicle to drive on Dry Creek Road. If this is the case, then you will do the following:
The last option is the one I used when I hiked to Vultee Arch and here’s how it works:
I personally love a difficult hike, so option 3 was right for me in this case. I can also navigate my way through these trails and again, there’s nothing confusing about any of the options on this list to reach the arch, but if you’re not physically fit, forget option 3.
The first option to hike to Vultee Arch is “technically easier” and that’s because there is an option A and B to do it. Here’s how it works:
The second option is your fallback plan if you don’t have a high clearance vehicle to drive on Dry Creek Road. If this is the case, then you will do the following:
The last option is the one I used when I hiked to Vultee Arch and here’s how it works:
I personally love a difficult hike, so option 3 was right for me in this case. I can also navigate my way through these trails and again, there’s nothing confusing about any of the options on this list to reach the arch, but if you’re not physically fit, forget option 3.
Quick info on the Vultee Arch hike:
- Name: Vultee Arch hike.
- Location: Sedona, Arizona.
- Distance: 3-10 miles (depends on which trail you take).
- Difficulty: Moderate to difficult.
- Easy to get lost? Not really.
- Rating: 5 out of 5.
- Family friendly hike? If you take the easier trail, then yes. Otherwise, I’d avoid it.
Option 1 to reach Vultee Arch explained (easiest):
 The first option to hike to Vultee Arch is “technically easier” and that’s because there is an option A and B to do it. Here’s how it works:
Option 1 (4 mile, easy hike):
- You will head to the Devil’s Bridge parking lot (it is known as Dry Creek trailhead).
- On that parking lot, you will not stop there, but will access Dry Creek road and drive for about 3 miles on it. This road is extremely rugged, rocky and only accessible for high clearance or 4X4 vehicles.
- You will access the Vultee Arch trailhead at the end of Dry Creek Road after driving on it for 3 miles. You will actually drive past the Devils Bridge trailhead road too (1 mile before the Vultee Arch trailhead).
- You will park your car on the Vultee Arch trailhead, and hike about 2 miles to reach Vultee Arch. The hike is pretty easy and the elevation gain is about 600 feet (not a lot of incline).
Option 2 to reach Vultee Arch (medium level hike, just a lot longer):
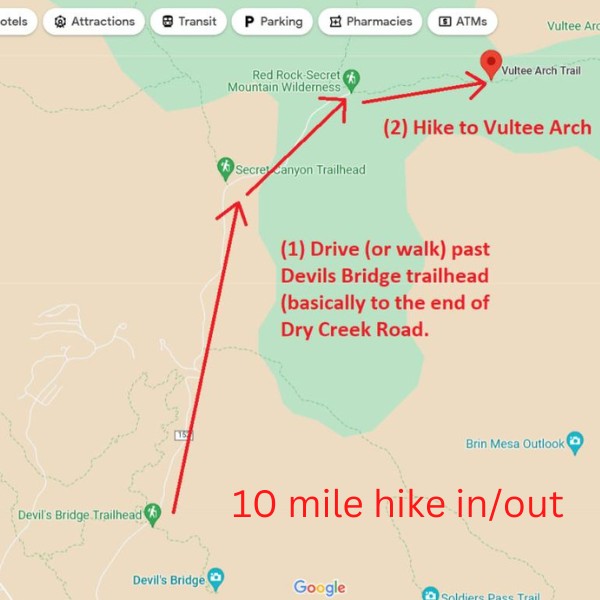 The second option is your fallback plan if you don’t have a high clearance vehicle to drive on Dry Creek Road. If this is the case, then you will do the following:
- Reach and park at Devils Bridge Parking lot (again it’s called Dry Creek Trailhead).
- You will then walk the entirety of the Dry Creek Road on foot (3 miles) to Vultee Arch Trailhead.
- From the trailhead, it’ll be another 2 miles to reach the arch.
- After reaching it, you will backtrack the same way.
- The first is that it’s longer than your first option (around 10 miles instead of about 4).
- Second, the Dry Creek Trailhead parking lot fills up quickly because 90% of all people who go there, do it to visit Devil’s Bridge.
- Third, if it’s a hot day, then you will need to bring a lot more water.
Option 3 to reach Vultee Arch (hardest hike, but shortest trail):
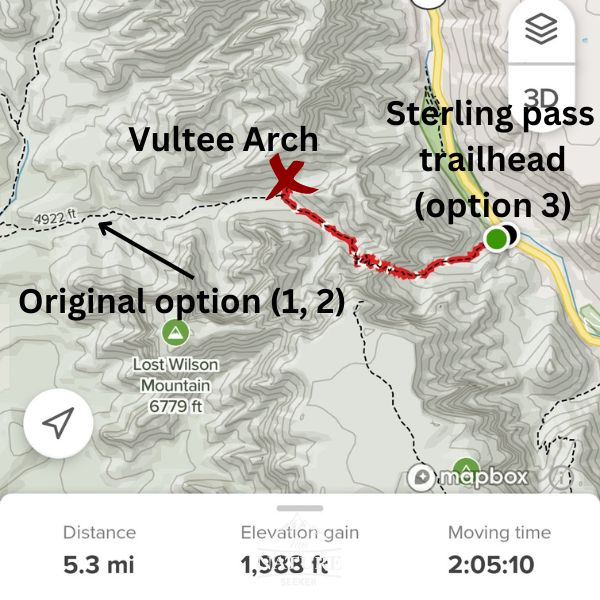 The last option is the one I used when I hiked to Vultee Arch and here’s how it works:
- You will park your car at Sterling Pass trailhead.
- You will hike about 2.5 miles to Vultee Arch.
- You will return the same way (about 5+ miles total hike).
- The parking area here is very limited. You’re looking at maybe up to 10 cars can fit there and it’s literally off the road, not some official parking lot.
- Second, the trail itself is very wild with a major elevation gain (my Alltrails report said it was about 2,000 feet of elevation gain).
- While the hike is straight forward in terms of navigating and there is eventually a sign to Vultee Arch (but very bushy with a ton of switch backs), Alltrails doesn’t actually have an official trail map for this version of it (I followed my own custom made map which wasn’t really difficult), so if you fear getting lost in the woods and are not a fit hiker or experienced for that matter, I would avoid this option.
Which option should you choose to reach Vultee arch and is it worth it?
 I personally love a difficult hike, so option 3 was right for me in this case. I can also navigate my way through these trails and again, there’s nothing confusing about any of the options on this list to reach the arch, but if you’re not physically fit, forget option 3.
- If you don’t have the right vehicle, forget option 1 and rely either on option 2 or 3.
- Go with your comfort level for this hike, because the first 2 options are decent in difficulty and the third is hard.
- Birthing Cave is another good one with less crowds than most others.
- West Fork Trail is popular/crowded, but beautiful and worth checking out.
- Fay Canyon is also less crowded than most (and short/easy).
- Soldier’s Pass Trail is excellent, but the only major con is another small parking lot.
- Also for arches, there’s a great one called Fay Canyon Trail in which there’s another cool arch to hike to.
- And finally (for now), there is the Boyton Canyon Subway Cave which I love, but the hike is moderate to get there and the parking lot (large) fills up quickly too.
Here’s good gear to bring if you hike to Vultee Arch:
- Salomon Speedcross 5. These are trail running shoes I wore when I hiked the harder route to Vultee Arch.
- Trailbuddy trekking poles. They helped a ton on the massive inclines for this Sedona hike.
- Also I cannot stress enough how important bringing lots of water is on this hike if you go during spring and summer! Also a good product to keep on you is the pH Miracle Phour salts (great stuff I use when I hike).