A Full Guide to The Indian Head Trail in The Adirondacks

After personally completing the famous Indian Head Trail in the Adirondacks, I have to say that it is the top hike I’ve done in the area by far and that may very well be the case when you do it too, but before that happens, there are things you need to know ahead of time that will help you actually do it, and complete it correctly and that’s what this hiking guide post is going to show you.
Quick info on the Indian Head Trail in the Adirondacks:
- Name: Indian Head trail NY.
- Location: Adirondack Mountains (Keene area NY).
- Hiking distance: 13+ miles (lollipop loop).
- What is it? An incredibly beautiful hike overlooking Ausable Lake and one of the most popular trails in the Adirondacks.
- Difficulty: Hard (I got 2,000 feet of elevation gain).
- Permit needed? Sometimes (I’ll explain below).
- Best time to start: Do it as early as you can, maybe around 7-8 am.
- Rating: 5 out of 5.
- Recommended hike? Yes! It is easily the top hike in the Adirondacks in my opinion.
Important! When you may need a permit to hike the Indian Head trail NY:
- When you need a permit do this hike: May-October.
- When you don’t need a permit to do this hike: November-April (according to Alltrails).
Now if you want to try and sneak in, I will advise against that as there is a 2 part check in as you are on the trail to ensure that doesn’t happen, one when you arrive at the actual trailhead parking lot, and one shortly after as you are about to enter the official trailhead area.
How to get a permit to do the Indian Head Adirondacks trail:
- Decide on which day you wish to hike the Indian Head trail.
- You will need to make an account on this AMR site.
- Create a new reservation at least 2 weeks in advance on the AMR site (you don’t need to select the Indian Head trail when you do, it’s already there). This permit also gives you access to a few other trails in the area. You can also choose if you wish to do a day hike or overnight hike there.
- Save the permit and show it to the staff when you enter the parking lot to the trail (although they will already have your name on a sheet).
Important tips for making sure you get the permit on time:
You will want to make a new reservation 2 weeks before you go. New openings for hiking days show up at 12 a.m on the site 2 weeks before your selected hike date (you cannot reserve a spot before).
So for example if I wish to go on the Indian Head hike on October 14, the new slot for that day would open up October 1st at literally 12 a.m on the AMR site and I would honestly recommend sitting at your computer waiting for the 12 a.m mark to reserve the spot right there. That’s how I did it and that’s the best way to ensure you get the right date for your hike (trust me those slots will fill up very quickly if you wait more days or hours).
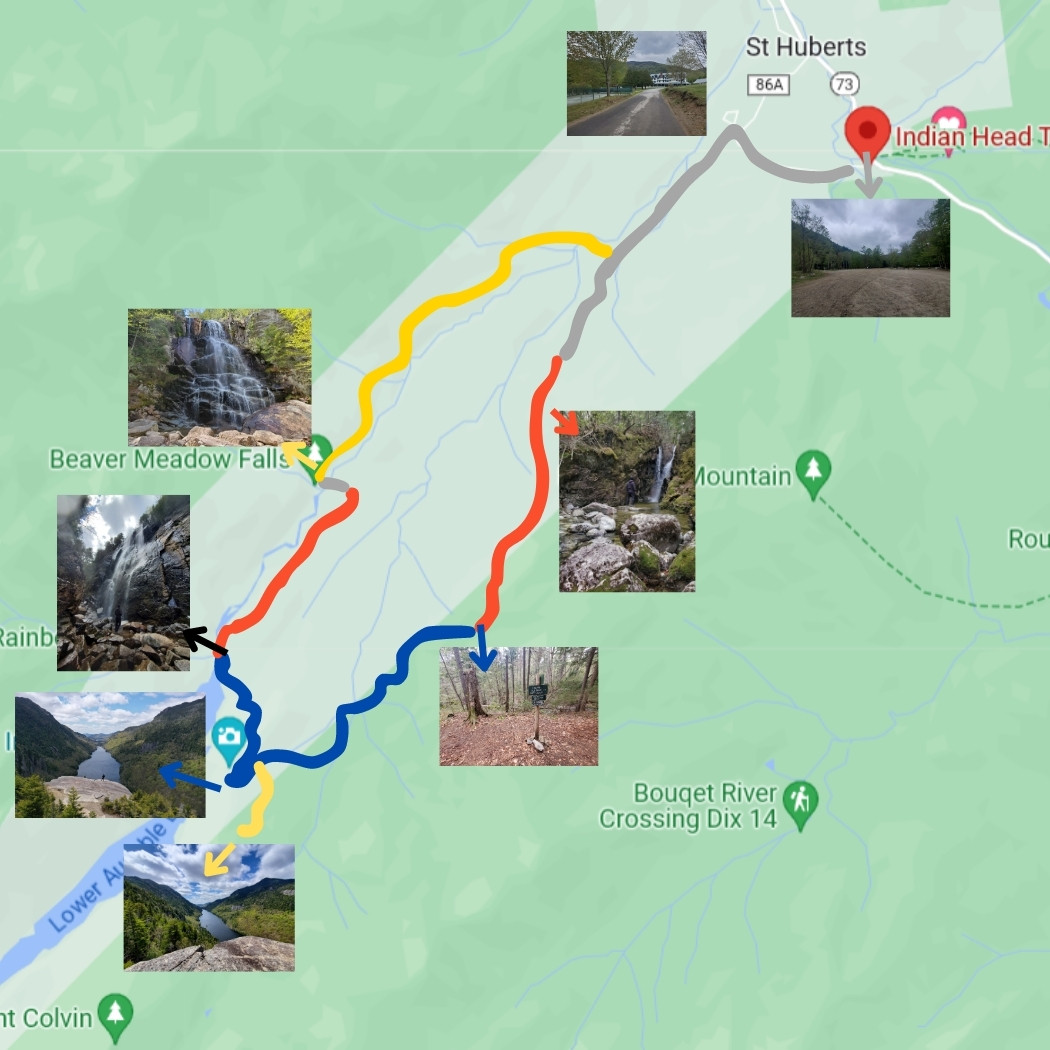
Here is an Indian Head trail map (and how I recommend you do it):

There are several trails and options to do the Indian Head hike and the one I’m going recommend you try is the 13 mile lollipop loop that you can actually download on Alltrails. I’ve included 2 versions of the same map above:
- One is a screenshot from Alltrails.
- And another is a screenshot from Google Maps with the same exact trail, except it shows you which trail colors to follow (just more reference).
For me, I did the Indian Head hike counterclockwise and here’s how it looked:
- Started on the grey trail (it’s a road).
- Worked my way to the red trail.
- Then the blue trail.
- Then the yellow trail (there’s 2 short ones as you can see above).
- Then to a new red trail.
- Then to a new yellow trail which circles back to the same grey trail as when I started.
This is the most popular way to do the Indian Head trail and by following this version of the hike, you will:
- See the best overlooks you’ll find on the Indian Head trail (there’s actually 3 of them, not 1).
- It also includes hikes to incredible waterfalls like Rainbow Falls (one of the best Adirondack waterfall hikes).
- Overall the hike will be most scenic this way (but also challenging).
While I have included a trail map of the hike just remember that you can also get it from Alltrails and similar spots and I do recommend you download the map for your reference as I had to use mine to properly do it and not get lost in the woods. Also I want to note that Alltrails says that the Indian Head hike is 10.8 miles but when I went, it was 13.5 miles in total.
What to expect from your hike on the Indian Head Trail (start to finish guide):
At this point in the article, I want to cover a summary of the hike you will be doing from beginning to end so you know what to expect. I will once again recommend you follow the trail map from above and also have a trail map (like from Alltrails) too just in case.
1) First you will park in the Indian Head Trailhead:

Here is the GPS to Indian Head trailhead and I will warn you now that for most of the hike, you will not have a good phone signal. But in terms of reaching it, it’s actually easy and you will need to stop at a security area to be let in. They’ll just confirm your reservation there and then you can park (there are bathrooms there).
2) Starting the Indian Head Adirondacks trail (expect mostly road walking for the first 3 miles):
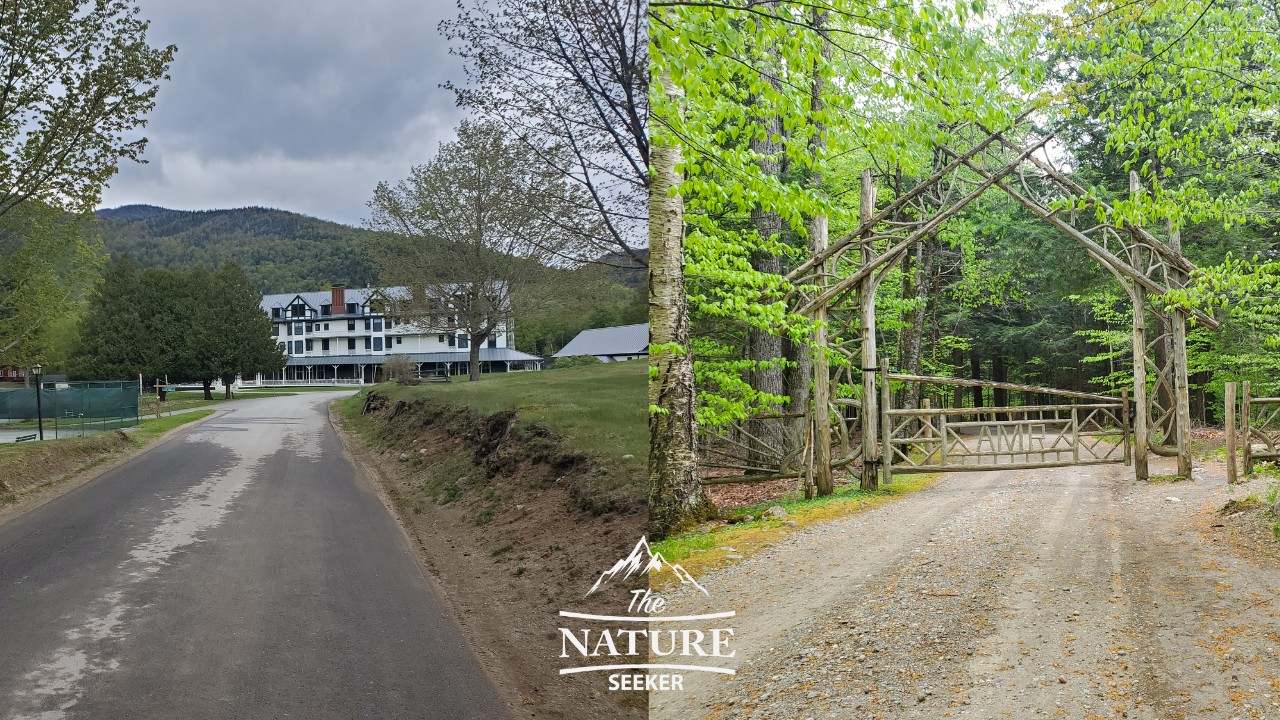
Once you park your car, you will walk on the road that’ll take you to the trail. This is called Ausable Road, which is not to be mistaken with Ausable Chasm (a completely different attraction in New York which I do recommend you see). This road is on dirt, but it’ll take you past a golf course and resort.
You’ll turn left from Ausable Road to get on Lake Road and this is where you’ll continue. Shortly after turning on Lake Road, you’ll pass the second security check and sign in before you do the hike. Then for about another 2 miles you will be walking (slow incline) on Lake Road. There will be trails on both sides (and private roads) which you will want to avoid.
3) Getting off Lake Road (3 miles in) and into the hike to Indian Head (red trail):

At around 3 miles into the hike, you will come across a trail sign to Gillbrook Trail (red trail, to your left). Take that to continue.
You will then follow that red trail for about another 1 mile and it will take you past a few beautiful waterfalls as well as options to take the scenic or easy trail options along the way. I recommend you do the scenic options as they are short and worth it.
Note: This will be the first part of the hike where you will be on an official trail (red).
4) Switching to the blue trail (Indian Head Crossover Trail) and working your way up to Indian Head Overlook:

As you are on the red trail, it will split and you will see signs for Indian Head pointing right. Take that right, which will put you on Indian Head Crossover trail) and continue. This trail is marked as the blue trail.
This will continue for about another 1-2 miles and there will be a serious elevation gain at this point. You will even have stairs and high rock scrambles to be on, but it’s worth it as the views and overlooks are going to be happening very soon. Your first overlook will come up as you reach the summit. It is called North Outlook and I recommend you check it out.
5) Reaching the famous Indian Head Adirondacks overlook:

Once you finish up with North Overlook, you will continue on the blue trail and you will soon come up to a 4 way intersection and you will see signs on where to go, but here’s what you need to know:
- The main Indian Head Overlook is right in front of you (just continue straight).
- There is a second overlook to your left (Fish Hawk Cliffs Overlook). It is marked by a yellow color.
I recommend you explore both of them, but take the trail to Fish Hawk Cliffs Overlook first and then explore Indian Head Overlook. Here is what Fish Hawk Cliffs Overlook looks like (it’s amazing):
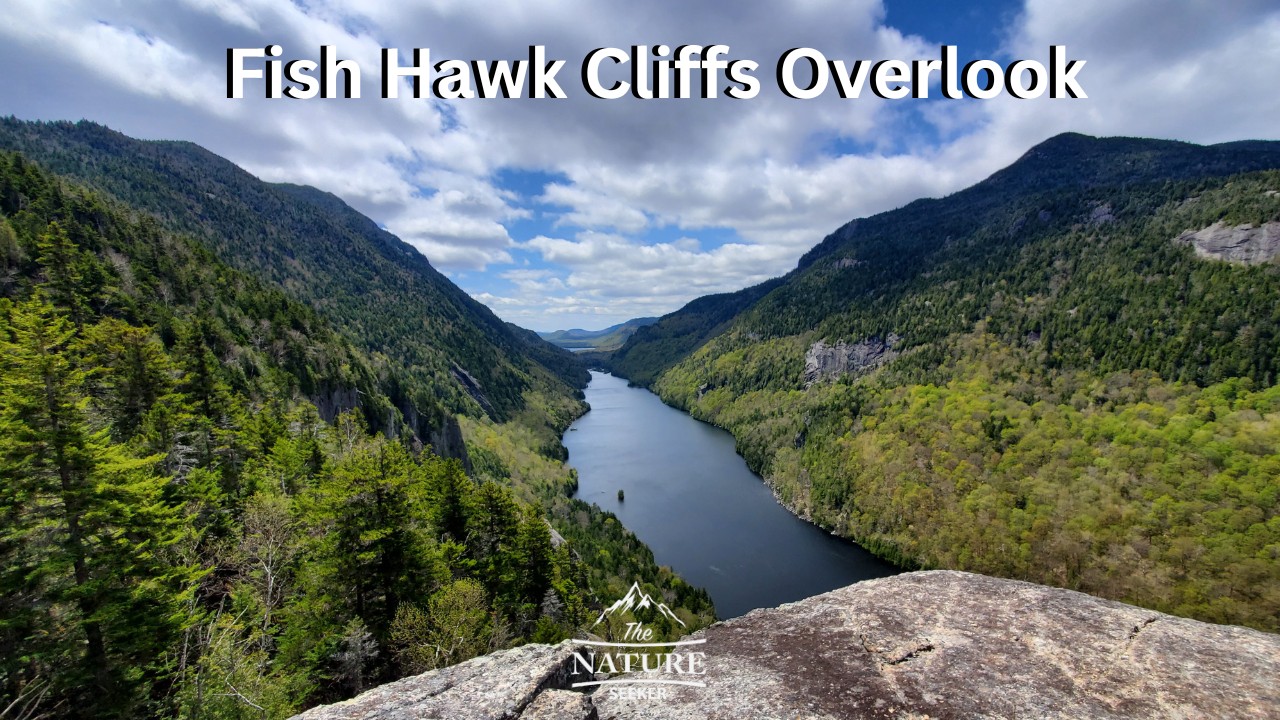
One thing to know is that in order to reach Fish Hawk Overlook, you will have to go down about 200 feet on the yellow trail before reaching it (the overlook is under half a mile to reach from the intersection). Once you finish it, you will backtrack and come back up to the same 4 way intersection, turn left and proceed to Indian Head Overlook which is very close by after the turn.
Indian Head Overlook is easily the best out of the 3 main overlooks you will see on the whole hike (North Overlook, Fish hawk Cliffs and Indian Head) and it is the most iconic you see all over. Take your time there. I am happy to say that both myself and the girl I was with, had it all to ourselves there for a whole hour.
6) Continuing on the Indian Head trail (after the overlook):
Before I continue, I want to share a comparison of all 4 overlooks so you can have a better idea of which one/s you want to see (although I recommend all 4):

But anyway once you finished sightseeing one or more overlooks, work your way back to the 4 way intersection, but this time turn left. This will keep you on the Indian Head trail and have you work your way down. There will be a lot of switch backs in this area and some ladder climbs.
Once you reach the bottom, you will actually cross the same exact Lake Road which you can optionally take (turn right) to walk back to the parking lot. However, I am going to recommend you turn left and continue on the Indian Head Trail. You will walk down and see a bridge. Take that for another awesome gem coming up.
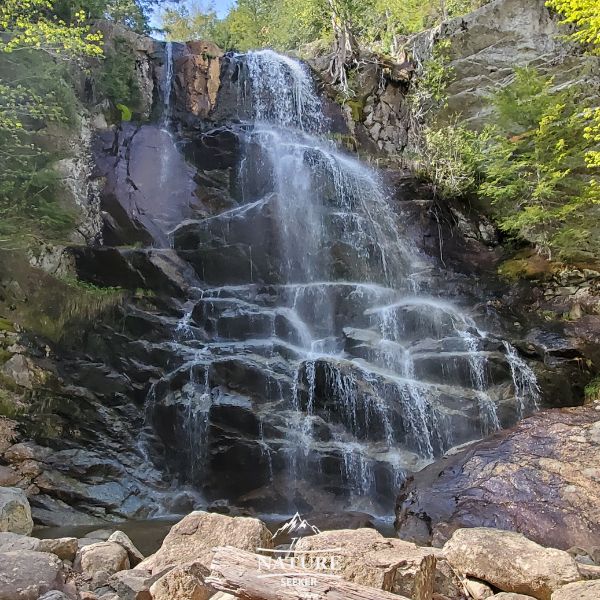
7) Reaching Rainbow Falls and continuing the Indian Head trail loop:

Once you cross the bridge, you will see signs for Rainbow Bridge (it isn’t far from the bridge). Take it to get to that waterfall. To date, this is my favorite (natural) waterfall in the Adirondacks and I’ll be adding it to a list I made on the best waterfalls in New York (it deserves it).
Once you are done, walk back to the same bridge, cross it and once you do, turn left and that will put you on a new red trail called East River Trail. That trail will continue for about 1.5 miles. It is pretty scenic, but nothing as good (yet) as what you saw on Indian Head. It is however serene and I personally liked it.
8) Turning to west river trail (yellow marker) and continuing back to the Indian Head trailhead:
After you cross about 1.5 miles on the East River trail (red), you will see signs pointing to West River Trail and Beaver Meadow Falls (to your left). Take it. That will have you cross a bridge and be on the yellow trail (West River Trail) which you will take for about another 2-3 miles. That trail will take you past awesome canyon areas and another giant waterfall called Beaver Meadow Falls (not as good as Rainbow falls, but it’s still awesome).
9) Returning back to Lake Road and completing the Indian Head Adirondacks hike:
You will continue on the yellow trail until you reach a bridge crossing and sign to “Lake Road” which you will take. That will take you across the river and on a road (this is not Lake Road yet). You will follow this road until you cross another bridge over a small river and that will put you back on Lake Road. Once you cross the bridge, you will turn left and basically just backtrack to the parking lot. You’ll cross the same golf course and Ausable Road and reach the parking area to finish.
Note: The gate to the parking lot is locked after a certain point in time, but it’s automatic meaning you just drive up to it and it will open from the inside.
And that’s it, you will have completed the Indian Head Loop trail this way! It took us about 7 hours to do it fully (including all the stops for photos), but this is seriously the best trail I have seen in the Adirondack Mountains and possibly the best hikes near NYC (and the state). As I was on this trail, I couldn’t help but compare it to all the trails I’ve seen in NY and as of right now it’s my favorite hike.
Other questions about the Indian Head hike:
Is Indian Head a mountain in the Adirondacks?
Indian Head is not a mountain but an overlook in the Adirondacks.
Can you hike Indian Head without a reservation?
Only between November through April. Every month after that (May through October), you need to get a permit to hike Indian Head.
How tall is Indian Head Adirondacks?
The elevation of the Indian Head Adirondacks overlook is over 3,500 feet.
Related hikes to check out besides the Indian Head Adirondacks trail:
I hope that this post on hiking to Indian Head in the Adirondacks was simple and helps you enjoy this trail to it’s fullest! This is indeed a trail I will come back to in the future and it’s also arguably one of the best fall hikes in the Adirondacks worth checking out as well. This is my next goal as it’s one of the best places to see New York fall foliage. If you are also aiming to do that, I would honestly make a reservation to do it in early October.