How to Hike The Avalanche Pass Trail in The Adirondacks
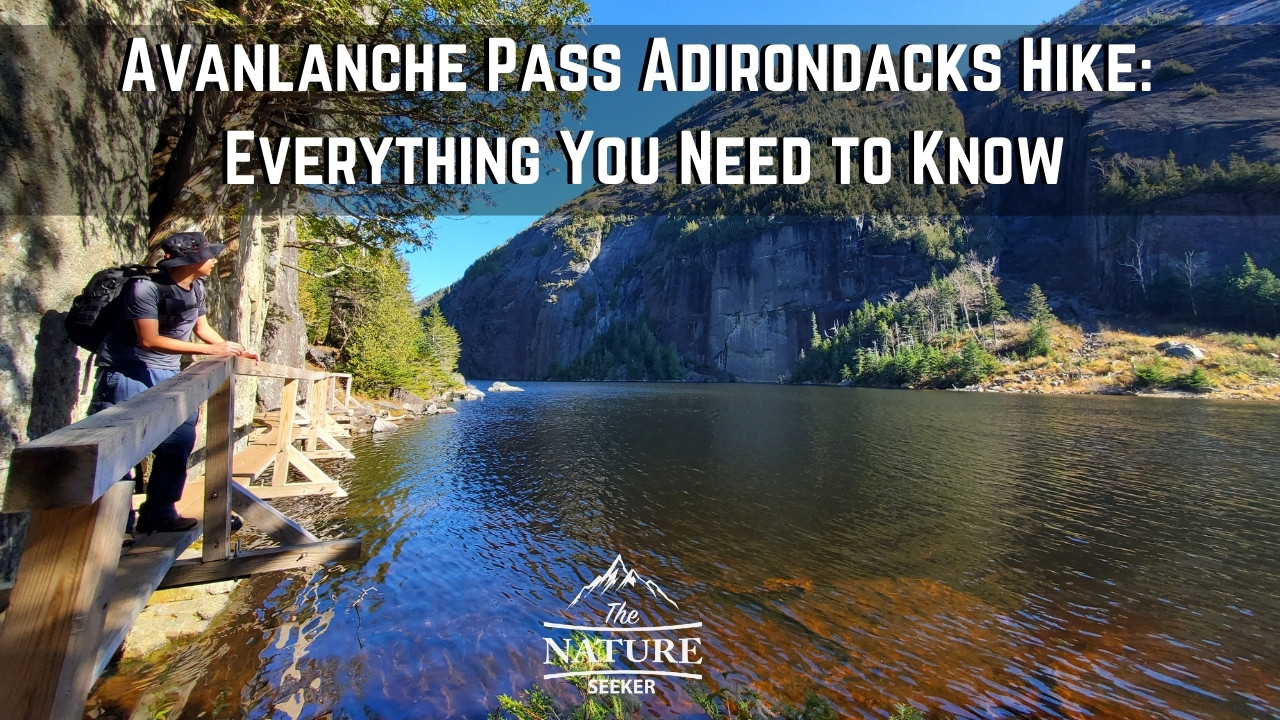
Several days ago I got a chance to finally hike the Avalanche Pass Adirondacks trail in NY and while it was definitely worth it, there were a few surprises and parts of it that confused me (and others) which is why I decided to write this post to help you navigate it correctly and not run into any problems.
Quick info on the Avalanche Pass trail:
- Name: Avalanche Pass (aka Avalanche Lake)
- Location: Adirondack Mountains NY
- Hike distance: 12 miles in and out (6 miles to reach Avalanche lake)
- Difficulty: Moderate to hard
- Hike rating: 5 out of 5 (once you reach the lake, it’s not fun before that)
- Easy to get lost? In some parts, yes
- Permit/reservation required to hike? No
- Recommended hike? For in shape hikers and those who have no problem navigating, yes! Now with the info about it out of the way, the next thing I want to talk about is a summary of the hike, followed by the details of what to expect on each part of it.
Summary of the Avalanche Pass trail:
- This hike is 12 miles long (6 in and 6 back).
- The first 4 miles of this trail are muddy, a bit confusing in parts and there are several forks and trail marker color changes.
- The last 2 miles of this hike are where it gets absolutely amazing (where the lake area starts).
- In that area you will find cool scrambles, ladder climbs, board walks over the water and amazing views of the lake and mountains.
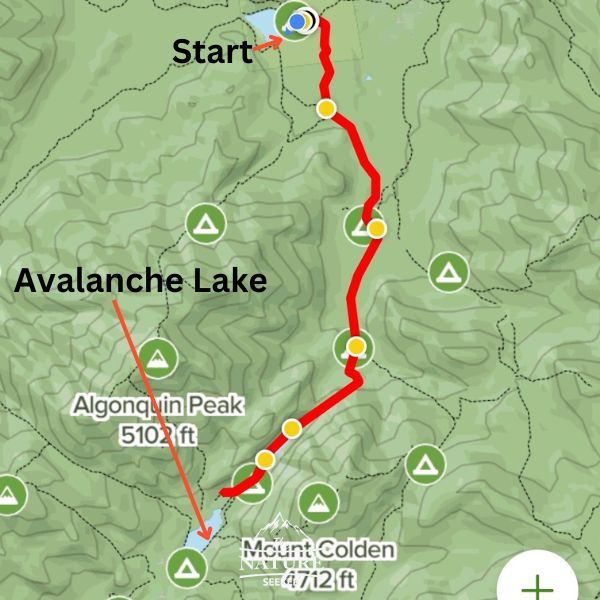
I’ve included a map of this hike to the right. It’s a screenshot from Alltrails and I’ll be linking to that specific map on the app too in case you are using it too. It may seem like a simple hike, but there are parts which can surprise you and also confuse you. But before we get into that, this all requires you know where to find this trail and how to navigate it so that’s what we’ll focus on now:
Starting out (it’s a little confusing):
So the first thing to understand about this hike is that it doesn’t have an official Google map listing. In order to get to the trailhead to Avalanche Pass, you have to input another location and that’s the High Peaks Information Center (GPS info added there).
As you drive to that area, there will be a giant parking lot all around it, with a campground area as well. However, if you come here on a weekend, this whole place is likely to be filled up and you may need to park your car anywhere from half a mile or more north of that High Peaks Info Center (this is what I had to do).
Another thing to know is that this area has multiple hikes, not just Avalanche Lake and while there are trailheads and maps available, they are quite confusing (don’t worry, I’ll show you where to find the right trailhead).
The same High Peaks Information Center sells an official map of the area for an astounding $12+ (a rip off in my opinion) and I found that you can see the exact same map on the trailhead once you reach it so you can just take a picture of it. However that map is very annoying to figure out and I personally thought it made the navigation way harder.
What was MUCH easier was using Alltrails and looking up the trail there (I’ve included a link here). That is the map that really helped us find the right path.
Starting off on the right trail to Avalanche Lake NY:
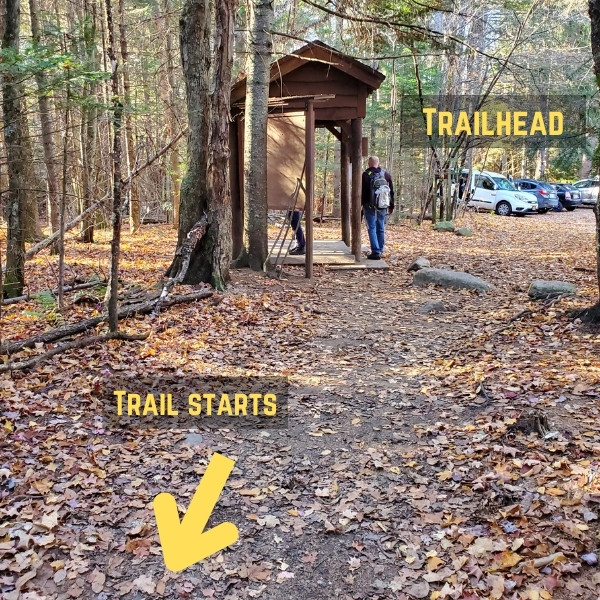
Once you reach the High Peaks Information Center, the key is to walk east of that building. The trailhead that leads to Avalanche Lake is there and it’s only about 200 feet from the center. You will see a lot of cars parked nearby. Then you will begin the trail and after about another few 100 feet come to a fork.
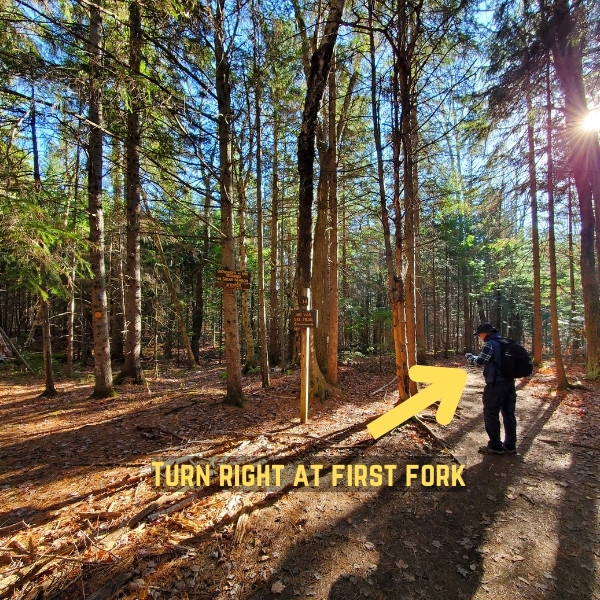
You are going to want to turn right at this fork and this was one of the other examples of confusing trailheads because the left side showed trail markers (yellow and blue) which we were told is the right path to head, yet my Alltrails app showed that we had to turn right and it ended up being the right choice. Anyway, just turn right and you will walk on a simple trail with no trail markers for about 1 mile. You will come across a scenic board walk on this mile and have some incline areas.
Coming to the next fork to Avalanche Pass:
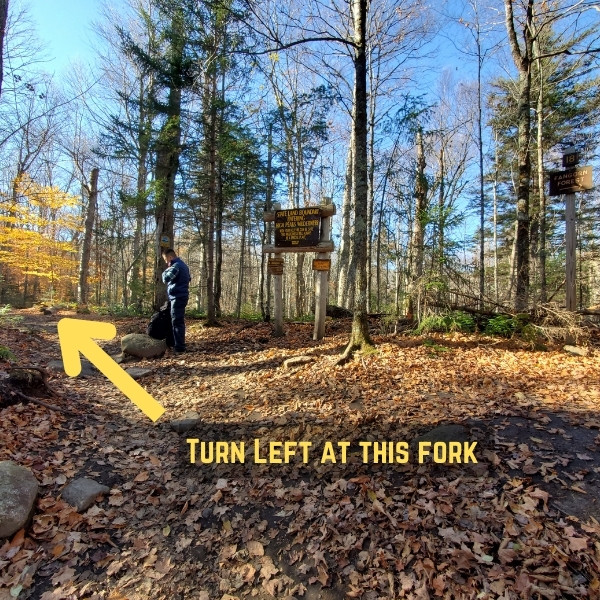
After walking that 1 mile, you will see another fork. Right leads to Fangorn Forest, not to be mistaken with the Lord of The Rings place. But you’re going to want to turn left here and continue for about half a mile.
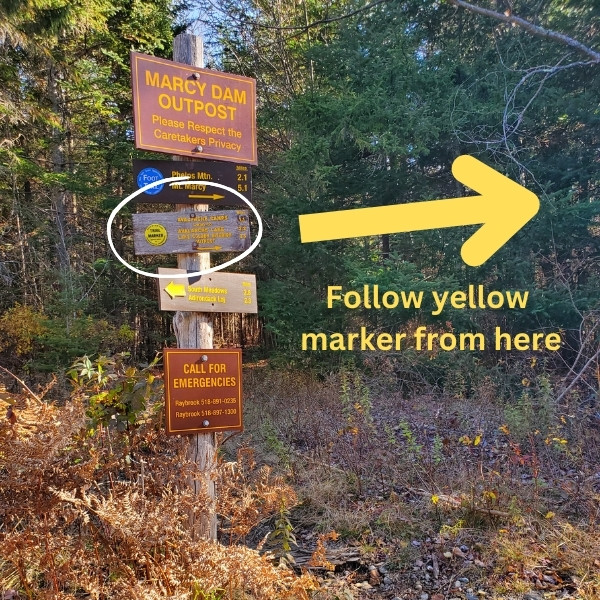
You will then come across another fork where you will finally see signs for Avalanche Lake and the official blue marker for it. From there, you will continue for about 1 mile on an easy to navigate trail and just follow the blue markers (the trail is also pretty simple to stay on). After that 1 mile, you will come across a broken bridge and signs to go around it (you will cross the river) and there is another bridge close by to that one. That’s the one you’ll cross.
Once you do, then trail then turns into a mix of a yellow/blue trail and it gets confusing, but the GOOD news is that it’s pretty simple to follow. The only forks you’ll see from there are turns into campgrounds or signs that say “privy” or “lean to” all of which do not go into other parts. Either way you will see more signs for where to go to reach Avalanche Lake so follow that and refer to Alltrails or another map app to be sure.
Note: From this area, you will keep following the yellow trail to Avalanche Lake.
The 1.5 mile mud ascent to Avalanche Lake:
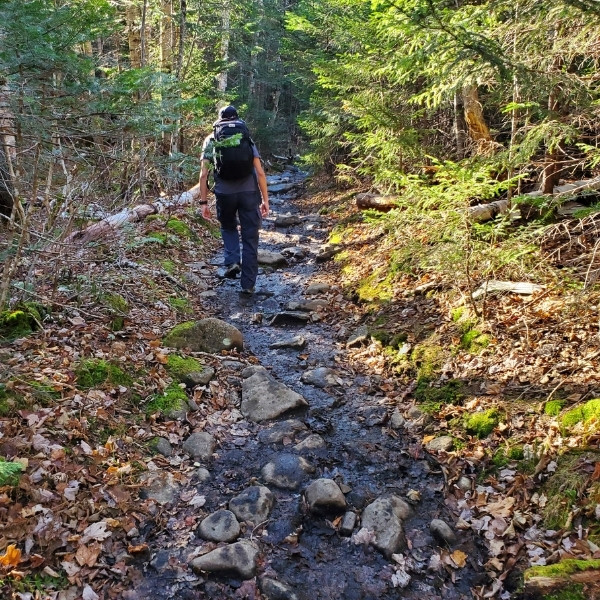
Shortly after you cross the bridge and a few more forks, there will be an annoying, muddy incline that spans off and on for over 1 mile. It’s annoying, tough to navigate around it and sometimes there’s even water flowing on it too.
You will not be able to avoid the mud so wear good hiking shoes and I also recommend waterproof socks here. I wore the Salomon Speedcross 5 trail shoes and the Randy Sun waterproof socks, my absolutely favorite waterproof socks for these types of hikes and I was totally fine here. Once that ascent ends, you will cross another bridge and continue on the yellow trail (no more blue). That will take you past a few camp sites, and up to your first ladder climb (one of many on this trail).
The short but confusing switch back ascent through the woods:
Out of all the parts of this trail I did not enjoy, this was it. Once you pass the bridge from the previous part, you will come across an area of the hike with a lot of trees and numerous spots that look like a trail, and it didn’t help that trail markings in this area didn’t exactly appear frequently.
We had to guess which way to go by following what seemed like the most obvious trail, so I would be careful here. It’s not long (thankfully) but it will go on for about 1/4 miles and you will have to cross another muddy area like you did before in parts of it.
Note: You will see yellow markers in this area (rarely) which shows you are on the right path. Remember, after the bridge area (prior to the long mud incline hike) you started on the yellow trail. You are just following that.
Getting to Avalanche Lake:
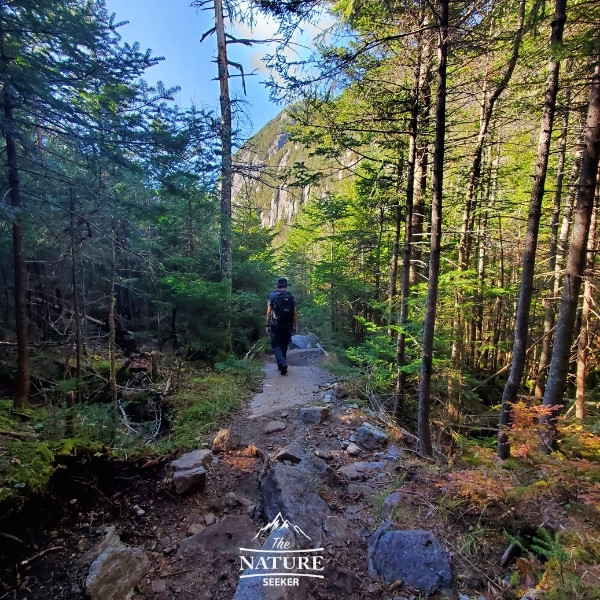
Once you get out of the annoying woods area, you will continue a steady incline and run into a lot of board walk areas. I would be careful if they are wet because they are slippery, but at least at this point the trail is easy to follow. Anyway, it gets pretty scenic here, but you are not quite at the lake just yet.
You will continue on the trail and still run into a lot of board walk areas. Some of them may be broken or flooded (as was the case for me) but there are alternative trails that go around those parts (it will be muddy though). As you keep going on this trail you will begin to see an opening in the distance and giant mountains, indicating you are close to Avalanche Lake. By this point you will have crossed about 4 miles of the trail.
Entering Avalanche Lake (the best part of the trail):
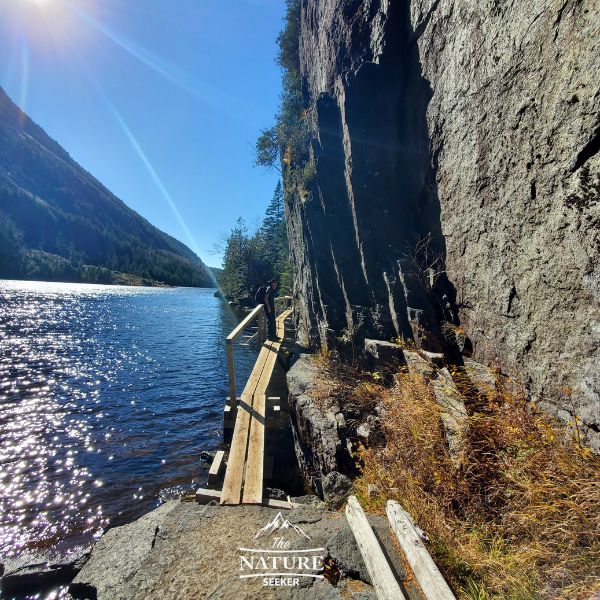
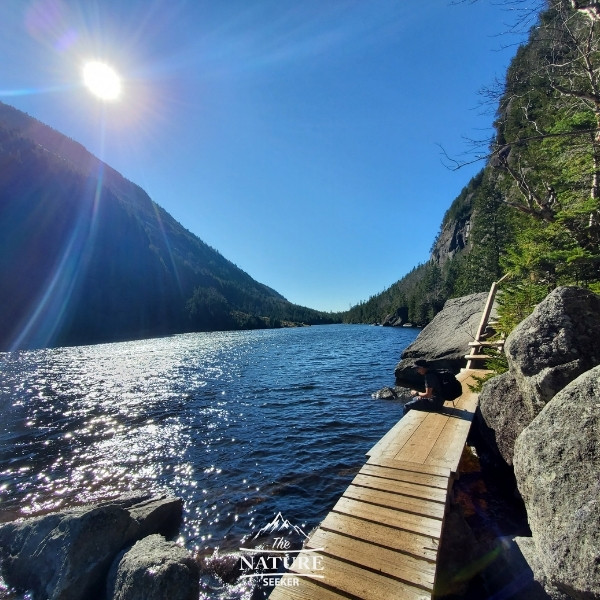
Once you get to the lake, you can elect to stay at that area and then turn around, but if you are adventurous and really want to see why I rated this trail 5 out of 5, you will want to continue. It may look like the trail ends once you reach the lake, but trust me, it doesn’t.
You will find a continuation of the trail from the same one you’ve been one and it will get tight in spots, you will run into many ladder parts and amazing overlook areas. There will also be boardwalks to enjoy great views on and this will continue for about another mile before you reach the end of the lake.
From there another connecting trail is available which leads to another lake which I was told isn’t as scenic as Avalanche Lake but it’s something I’ll explore in the future. Anyway, once you have completed your trip (about 6 miles in) you can turn back and literally retrace your steps back to the trailhead. I found the hike back to be easier but I would recommend you enjoy the Avalanche Lake area for as long as you can because it really is amazing. I loved this hike so much that I included it in my best hikes near NYC list, although coming here would likely involve staying at a hotel afterwards.
Other tips about the Avalanche Pass trail hike in NY:
- I’d start the trail early.
- Don’t bring dogs on this trail (the ladders part will be too tough for them)
- Try to come on a weekday to do this hike (less crowds)
- Don’t do this hike if you are injured or not used to tough trails.
Questions about the Avalanche Pass trail:
How long does it take to do the Avalanche Lake trail?
It took me about 6 hours to do the 12 mile Avalanche Lake trail.
Is the Avalanche trail hard?
For some people Avalanche Lake can be a difficult hike to do, but for most it’ll be moderate.
Can you swim in Avalanche Lake Adirondacks?
Yes there are areas in Avalanche Lake where you can swim.
Are there fish in Avalanche Lake NY?
Yes you can see fish swimming in Avalanche Lake. We also saw a snake there too.
If you have any questions about hiking to Avalanche Lake or did the hike already and want to share how it was, let me know!