How to Hike The Wire Pass Trail – Step by Step Guide
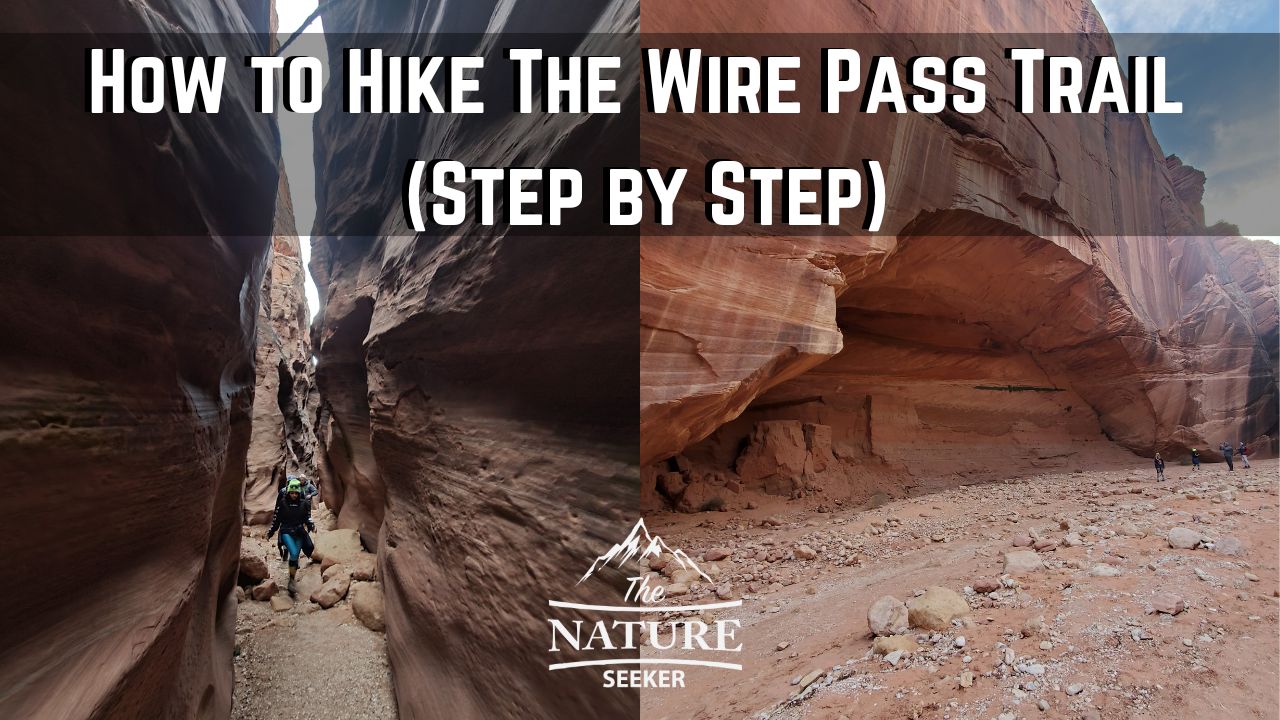
I recently did the Wire Pass Trail in Utah and I have to say that it is one of the best, most scenic and easiest hikes I’ve done, and I highly recommend it. If you don’t know, the Wire Pass trail is basically a simple, slot canyon type day hike and just about anyone can do it. You’ll come across a beautiful river wash, a canyon walk, slot canyon areas and see much more. The trail is pretty short, but this guide will give you everything you need to know about it, from how to get there to whatever else you need to know.
 I’m glad I researched this before coming here. Getting a permit for this trail is a little annoying, but here’s the process explained:
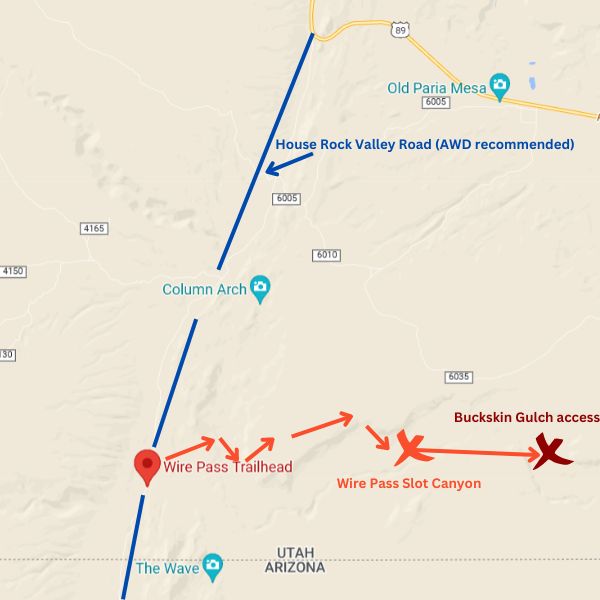 You can access the Wire Pass Trailhead from the north (from road 89) or the south (road 89A). Between these 2 highways is a connecting road called House Rock Valley Road which you will need to go on in order to reach the trailhead and it is not paved, is often very rocky and a tough drive to go through if you are on a regular sedan car.
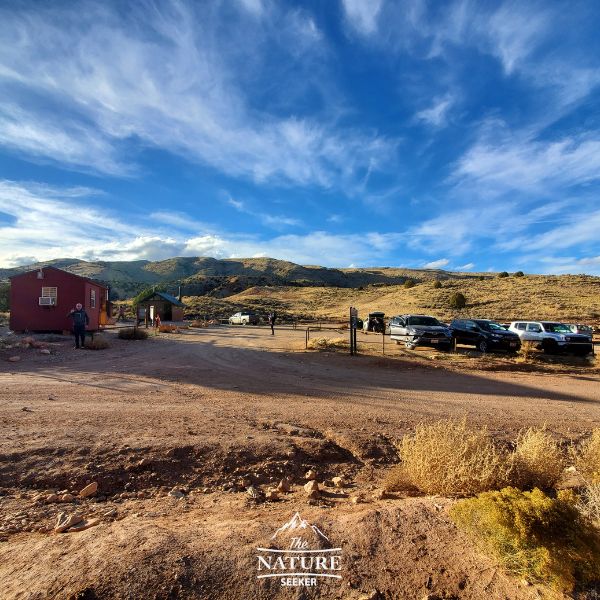
I would strongly recommend coming to the Wire Pass Trailhead area in an SUV with AWD or a 4×4 car. I also recommend you visit the Wire Pass Trail from the north, because it is only 8 miles to reach it. If you come from the south, you will have to be on the annoying, rocky road for over 20 miles. But in any case, the trailhead is off the same rocky road and it’s easy to spot (you’ll see a large parking lot) with a lot of cars.
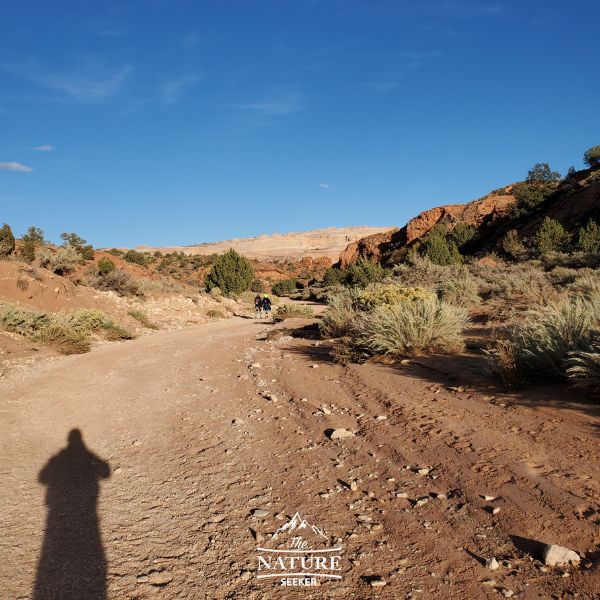 To start the trail, you’ll have to cross the road and look for a sign post (it’s easy to spot as it’s right by the parking lot). You will basically enter a wash area (where a river used to flow on). You will follow the wash area north (normally you’ll see people coming and going through it as it’s a popular trail).
For the first mile or so, the trail will just be on the wash and will zigzag from time to time. You will encounter some “short cut” areas where you can hike over the wash area. It’s optional to go on these areas, but they all meet up with the main trail. Heading along the wash is the easiest way to navigate through this trail so you won’t get lost.
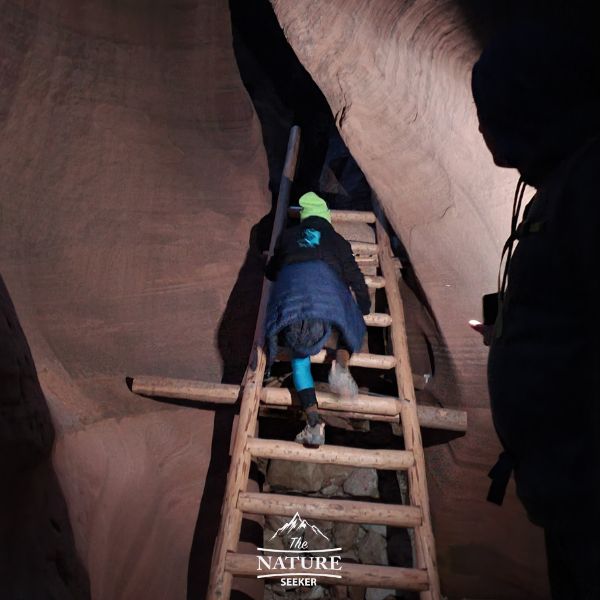
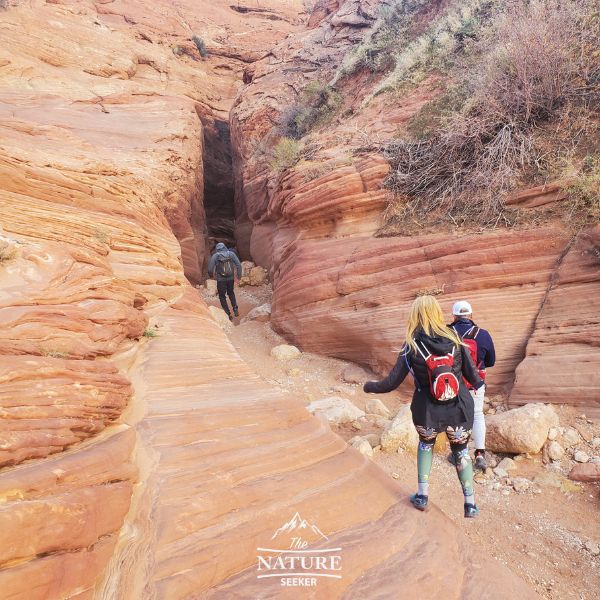 At around 1.5 miles into the trail, you will start to slowly descend into the first slot canyon area. There are actually 2-3 of them past the first 1.5 miles and the main, longest one will be last (which is Wire Pass). As you enter the main Wire Pass slot canyon, you will encounter a ladder area which takes you down about 20 feet.
There are instances where a flash flood washes away this ladder, so if you do find yourself in a spot where the ladder is missing, it’s because a flood washed it away, in which case I would not go any further. But in most cases, you should be fine, will climb down the ladder and continue through the beautiful slot canyon. It is beautiful and an excellent alternative to Antelope Canyon too!
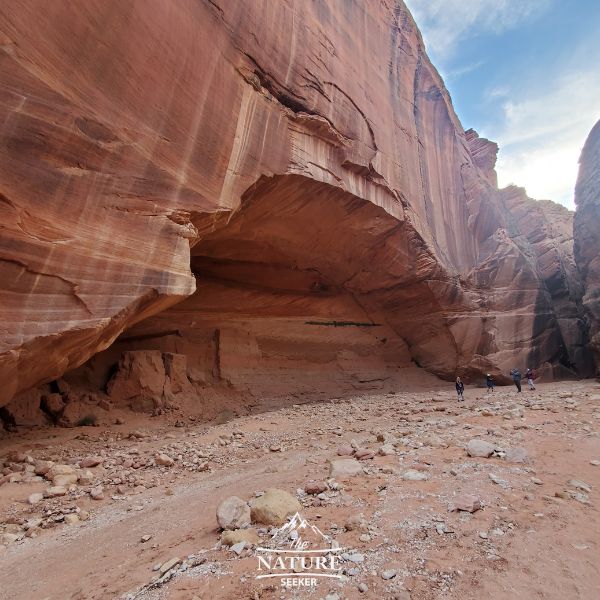 Shortly after going through the Wire Pass area, you will come across a huge opening area with a giant arch looking area to your right. This opening will meet up with another (longer) canyon known as Buckskin Gulch.
You will 2 options here:
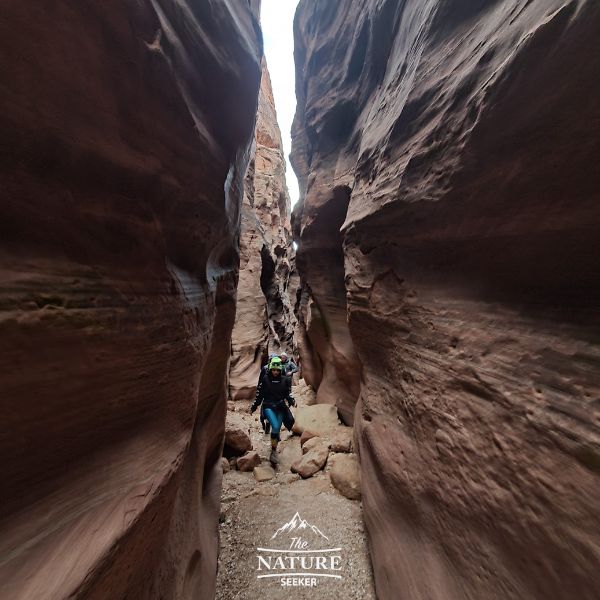 It’s very simple: Just turn around and go back to Wire Pass Trailhead. Just make sure if you are exploring Buckskin Gulch that you actually turn back to Wire Pass trail and don’t go in the opposite (Buckskin Gulch) direction. Going back through the slot canyon and wash is very scenic and you will get another great angle of the hike.The group that I was with exited out of Wire Pass trail and into the wash by the time the sun set and we were hiking back to our cars at night. This is one of the rare cases where I was OK with hiking at night because the moon and sky were beautiful and it was easy to navigate back to the parking lot.
From the moment you return to the parking lot, you will have to still drive out of the same rocky road to get back onto road 89 or 89A depending on which direction you came from. I would be very cautious driving through this road at night as there are several old wash areas with major bumps you have to very slowly drive through. And that completes the Wire Pass hike!
 Any slot canyon area in the mid west can be dangerous to be on during flood season which is usually April through September. Be sure to check the conditions before you go. You will see signs around Wire Pass trailhead showing the danger level and times to avoid going there.
Other than this, this trail is awesome! I really enjoying hiking there and fully intend to come back and hike through to Buckskin Gulch (fully) eventually in the future. I also include this trail on my best hiking trails in Utah to check out. But other than that, the Wire Pass trail is an excellent trail to explore for beginner hikers, families and people looking to check out Grand Staircase Escalante.
Quick info:
- Name: Wire Pass Trail.
- Location: Utah
- Hike distance: 3-4 miles (in and out)
- Permit required? Yes (details below)
Gear recommendations:
- Best rated hiking shoes for day hikes (men/women sizes available)
- Best rated hiking backpack for day hikes
- Best rated hiking pole for day hikes
Permit info:
 I’m glad I researched this before coming here. Getting a permit for this trail is a little annoying, but here’s the process explained:
- First, you can get the Wire Pass permit here.
- Second, you will need to find the Wire Pass trail on that same site. I included the direct link.
- Third, you will need to fill out the form (vehicle plate, number of people going, payment, etc…). The cost is $6 per person (Plus $0.50 charge).
Accessing the Wire Pass Trailhead isn’t easy:
 You can access the Wire Pass Trailhead from the north (from road 89) or the south (road 89A). Between these 2 highways is a connecting road called House Rock Valley Road which you will need to go on in order to reach the trailhead and it is not paved, is often very rocky and a tough drive to go through if you are on a regular sedan car.
I would strongly recommend coming to the Wire Pass Trailhead area in an SUV with AWD or a 4×4 car. I also recommend you visit the Wire Pass Trail from the north, because it is only 8 miles to reach it. If you come from the south, you will have to be on the annoying, rocky road for over 20 miles. But in any case, the trailhead is off the same rocky road and it’s easy to spot (you’ll see a large parking lot) with a lot of cars.
Starting on the trail:
 To start the trail, you’ll have to cross the road and look for a sign post (it’s easy to spot as it’s right by the parking lot). You will basically enter a wash area (where a river used to flow on). You will follow the wash area north (normally you’ll see people coming and going through it as it’s a popular trail).
For the first mile or so, the trail will just be on the wash and will zigzag from time to time. You will encounter some “short cut” areas where you can hike over the wash area. It’s optional to go on these areas, but they all meet up with the main trail. Heading along the wash is the easiest way to navigate through this trail so you won’t get lost.
Entering the Wire Pass slot canyon:
 At around 1.5 miles into the trail, you will start to slowly descend into the first slot canyon area. There are actually 2-3 of them past the first 1.5 miles and the main, longest one will be last (which is Wire Pass). As you enter the main Wire Pass slot canyon, you will encounter a ladder area which takes you down about 20 feet.
There are instances where a flash flood washes away this ladder, so if you do find yourself in a spot where the ladder is missing, it’s because a flood washed it away, in which case I would not go any further. But in most cases, you should be fine, will climb down the ladder and continue through the beautiful slot canyon. It is beautiful and an excellent alternative to Antelope Canyon too!
The first opening (exiting the slot canyon):
 Shortly after going through the Wire Pass area, you will come across a huge opening area with a giant arch looking area to your right. This opening will meet up with another (longer) canyon known as Buckskin Gulch.
You will 2 options here:
- You can explore a bit of Buckskin Gulch (considering how much time you have) and turn right or left to do it. My group turned right and explored a bit of it and it was just one long slot canyon similar to Wire Pass. Keep in mind that Buckskin Gulch is a very long slot canyon and I would not recommend trying to go to it’s end if you are doing a simple day hike through Wire Pass trail.
- Another option you have is just to turn back around and head back to the parking lot the same exact way (which you will have to do anyway).
Returning back to the Trailhead:
 It’s very simple: Just turn around and go back to Wire Pass Trailhead. Just make sure if you are exploring Buckskin Gulch that you actually turn back to Wire Pass trail and don’t go in the opposite (Buckskin Gulch) direction. Going back through the slot canyon and wash is very scenic and you will get another great angle of the hike.The group that I was with exited out of Wire Pass trail and into the wash by the time the sun set and we were hiking back to our cars at night. This is one of the rare cases where I was OK with hiking at night because the moon and sky were beautiful and it was easy to navigate back to the parking lot.
From the moment you return to the parking lot, you will have to still drive out of the same rocky road to get back onto road 89 or 89A depending on which direction you came from. I would be very cautious driving through this road at night as there are several old wash areas with major bumps you have to very slowly drive through. And that completes the Wire Pass hike!
Flash floods info:
 Any slot canyon area in the mid west can be dangerous to be on during flood season which is usually April through September. Be sure to check the conditions before you go. You will see signs around Wire Pass trailhead showing the danger level and times to avoid going there.
Other than this, this trail is awesome! I really enjoying hiking there and fully intend to come back and hike through to Buckskin Gulch (fully) eventually in the future. I also include this trail on my best hiking trails in Utah to check out. But other than that, the Wire Pass trail is an excellent trail to explore for beginner hikers, families and people looking to check out Grand Staircase Escalante.

When we were there Oct 20th ’23 the ladder had been replaced by a rope making it much more difficult if you don’t think you can climb using a knotted rope. Do you know if it is temporary until they get a new ladder?
I believe it’s temporary and the reason I say that is because I have heard stories of the ladder being washed out by a flash flood and then taking time to be replaced. It sounds like that is what happened and I’m pretty certain that in the near future, a new one will be put there.
REALLY like your quick info on the Wire Pass Trail!
A couple of questions on the permit.
1. Can you get a permit at the Wire pass trail location?
2. What are the fines (if any) associated to not having your pass shown in you car dashboard
Also, is this trail in the alltrails App?
Thanks Jay! For your questions:
1) Unfortunately not, it can only be done online.
2) Not sure about fines. I would assume it’s pretty large and it’s also the same trailhead as to go on the Wave hike and I heard the fines for that one (going into it without a permit) are astronomical!
3) Yes Wire Pass trail is on Alltrails as well!
Yes, you can get a permit on location. I’ve been there yesterday. It is now November 2024.
(I know this question is from 2022, the only reason I write it, is because people like me read this while doing research.)
Ah nice, is there some sort of Kiosk for this?
I now have another item on my bucket list thanks to this page. I felt like I was already walking the trail from the amazing photos you accompanied with the article.
In my experience with hikes and trails, would you really recommend the trail buddies trekking poles? Guaranteed I haven’t used them, but then again, I suppose I could always try it once.
I love the Trailbuddy trekking poles Jeremy. There’s 2 circumstances in which they have proven to be major helpers on just about every hike I do:
1) Avoiding injuries, giving me better balance and helping reduce joint stress and they are very easy to set up. I’ve had mine for over a year and take it on every single hike I do, even if I think I don’t need them (you never know if they can become needed).
2) The ONLY kinds of circumstances they get in the way is when I need to climb and use all fours. In those situations, I can fold them up, put them in my backpack and keep moving, but sooner or later they may become necessary to use again.
Point is, they aren’t a hassle to keep and provide major benefits in moving around. For me, I love speed hiking and they help me a lot in that regard and have also gotten me out of troublesome situations when I was injured.