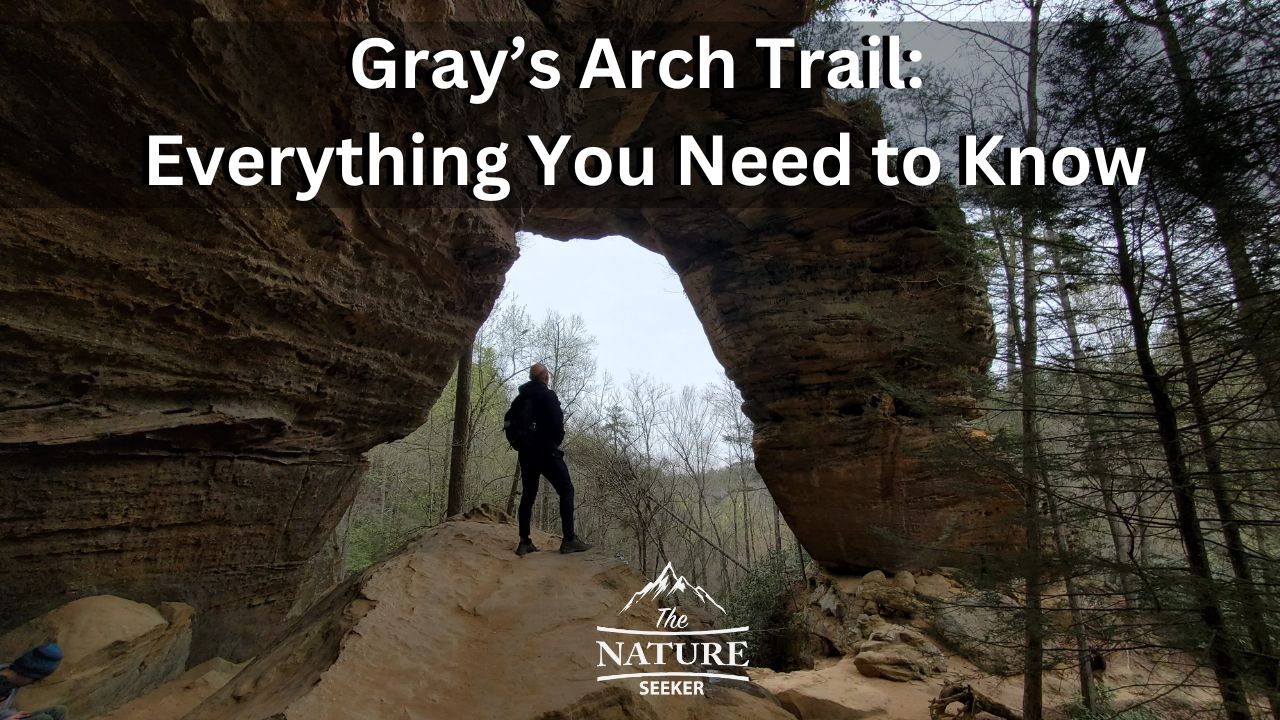
How to Hike Grays Arch Trail For Beginners
Grays Arch trail is one of my personal favorite hikes in Red River Gorge and while it’s easy to find, there are moderate levels of difficulty getting there as well as a different way of seeing it that most people don’t know about and I’m going to be talking about all of that here.
Quick info on Grays Arch trail:
- Name: Gray’s Arch.
- Location: Red River Gorge Kentucky.
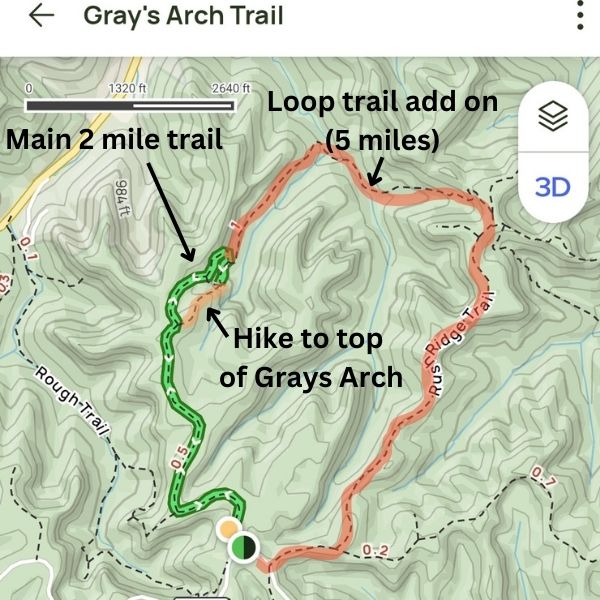
- Hike distance: 2 miles in and out (there is a longer loop option which is around 5 miles).
- Difficulty: Moderate.
- Rating: 5 out of 5.
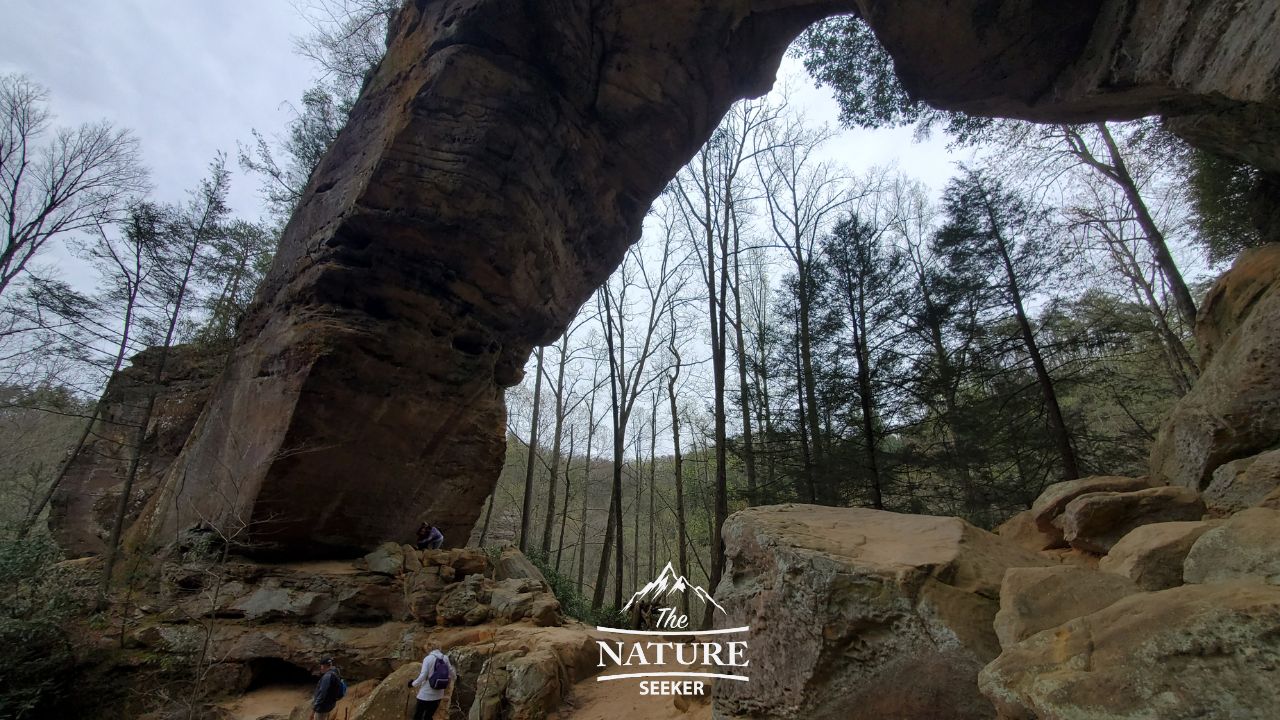
- Recommended? Yes! This is a great hike that I strongly recommend doing. You can also see Grays Arch from the bottom (best part) as well as hike over it which requires taking a side trail to reach (and yes I’ll be talking about that too).
1) Reaching Gray’s Arch trailhead:
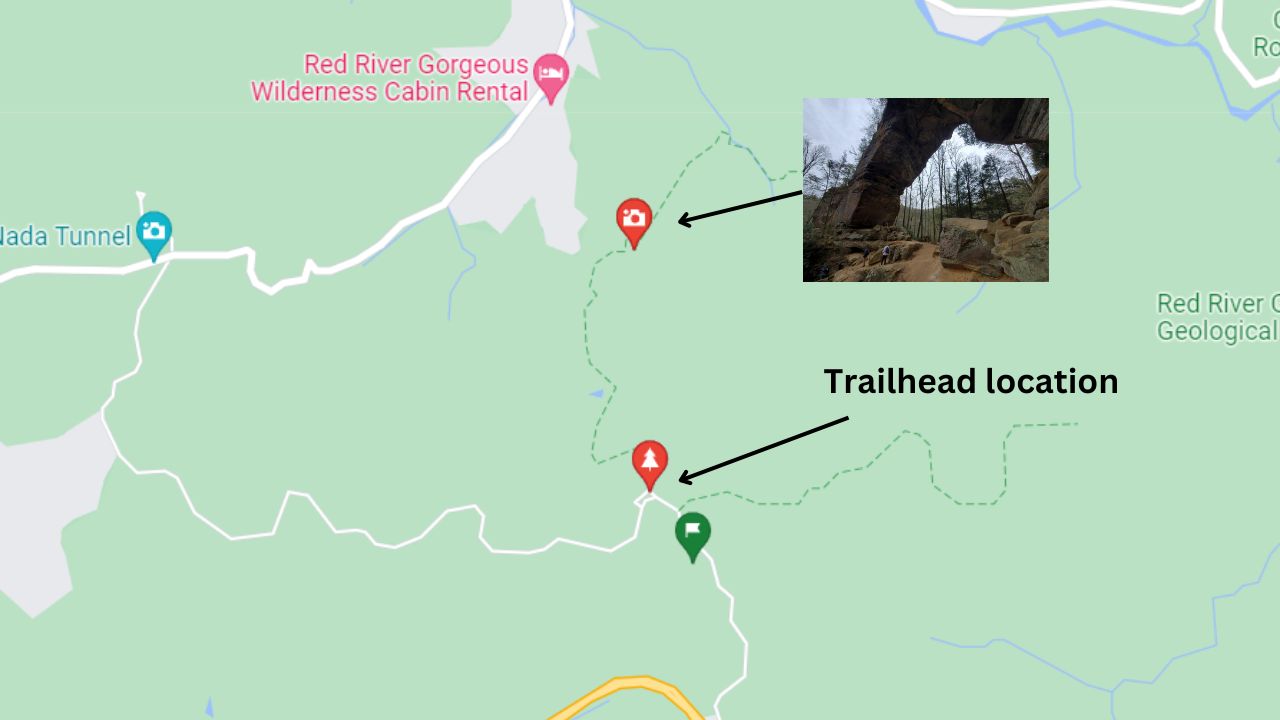
To get to Grays Arch trailhead, you’ll need to drive through gravel roads. Fortunately this road is very accessible for all vehicles, including sedans, but there are a bunch of potholes so I would drive slowly here. The trailhead is often crowded because of how popular this attraction is, so keep this in mind.
If you can get to this hike early or during a season when not too many people visit Red River Gorge in general (January-April or after September), then you’ll have a better chance at finding a parking. If it’s full, then you’ll still be able to park at one of the other parking lots as there are other trailheads there (you’ll just need to talk to this one then). Another good thing to know is that there are portable bathrooms at the parking lot and even a few picnic tables.
2) Starting out on the Grays Arch trail:
The hike from the parking lot begins as a very simple walk across a regular dirt trail and it will slowly descent for about 1 mile until you reach Grays Arch. There will be a few forks to other trails along the way but you will want to remain on this one (it’s easy to follow, but in my case I used Alltrails to be sure I was doing it correctly).
3) Reaching Grays Arch:
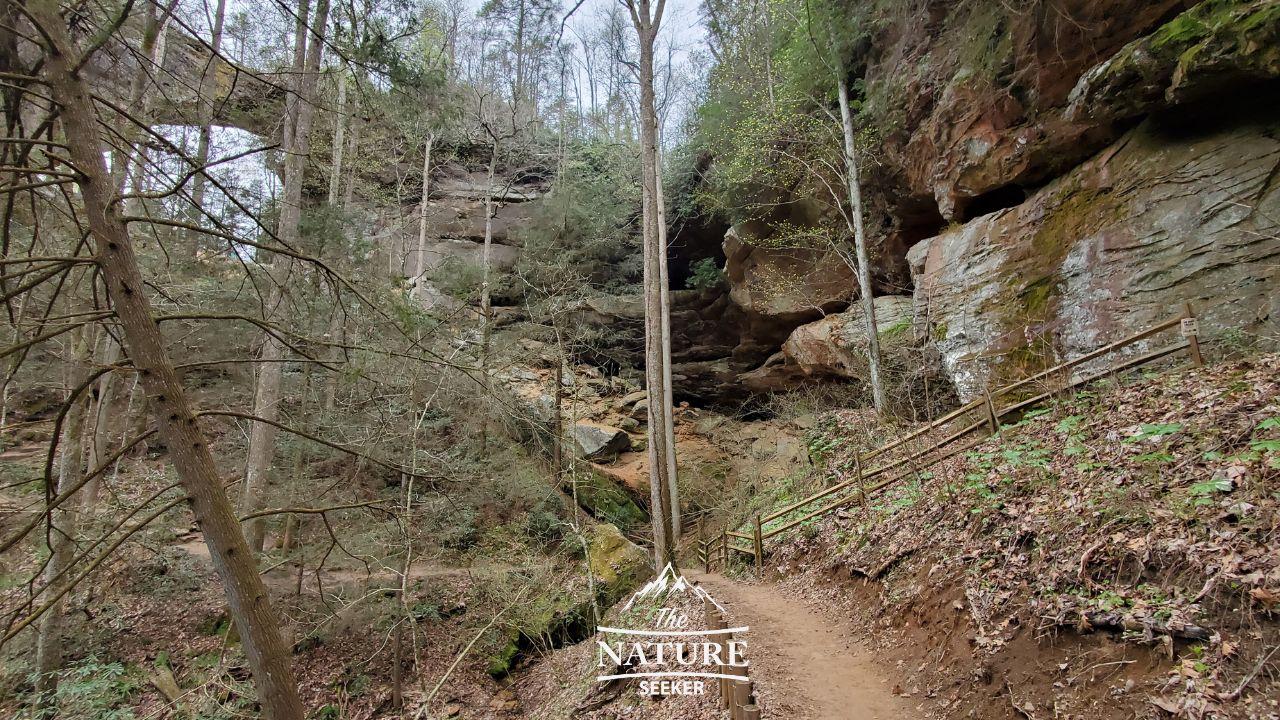
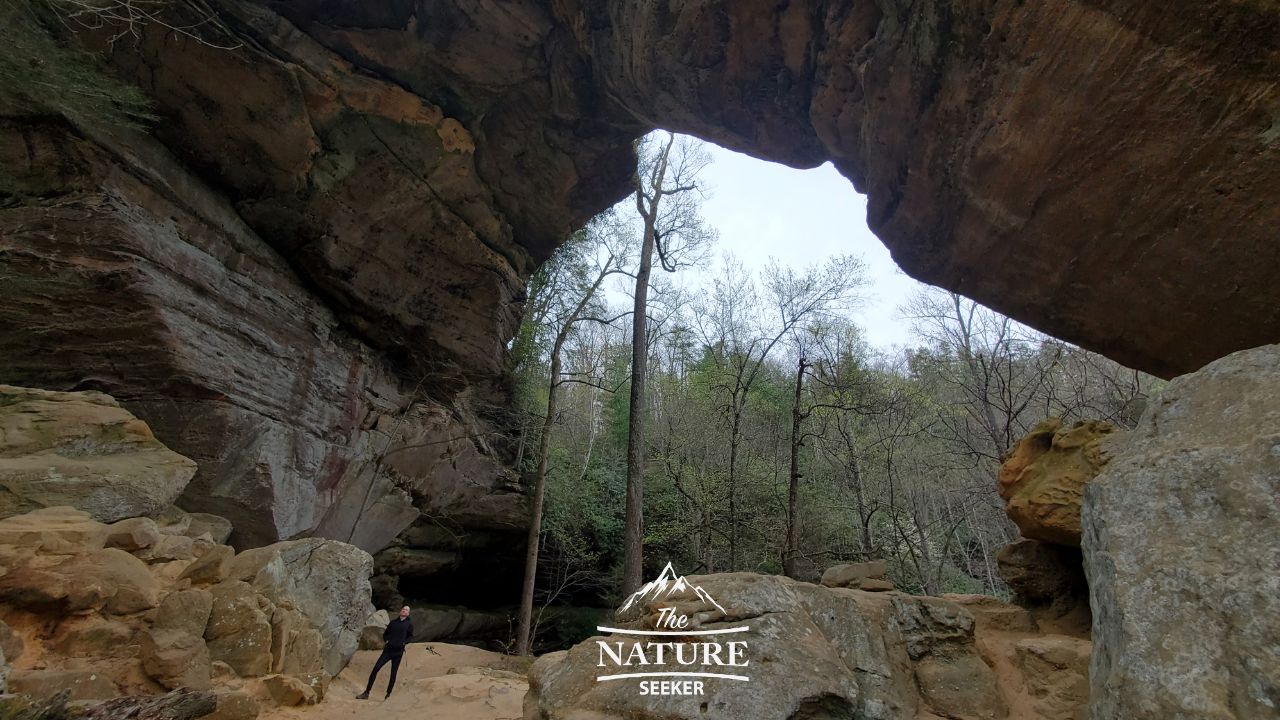
After about a mile of gradual descent, you’ll come across 2 levels of wooden stairs and you’ll also see Gray’s Arch from there. When you get to the bottom of those stairs, you will then need to hike up a very steep slope to get under Gray’s Arch itself. There are many angles from that point where you can take a bunch of amazing photos of this place. For the actual elevation part, you’ll looking at about 100 feet or so of hiking an a little bit of scrambling. If you have trekking poles, they’ll help here but if you don’t and you have knee issues, I’d recommend simple ones like the Trailbuddy trekking poles for this part (and the hike back to the parking lot).
4) Returning back to the Grays Arch trailhead:
After you’re done exploring it, the shortest way to get back to the trailhead is just to hike back the same way. This is where you will have a steady elevation incline of a few 100 feet for about another mile. Not only is this is the easiest way to do this trail, but it’ll also give you and opportunity for exta things to do in Red River Gorge.
5) Doing the Grays Arch Loop trail (optional):
Besides the main 2+ mile trail I just talked about, you can also do a longer loop version of the Grays Arch trail and here’s how that works:
- You’ll start at the same Grays Arch trailhead.
- You’ll walk down the trail and stairs, then go underneath the arch.
- After finishing, you’ll walk back up the wooden stairs but make a right turn (left would take you back to the parking lot).
- The right turn will put you on trail 221 and you stay to it for about a mile until you reach trail 227 (Rush Ridge Trail) where you will turn right (putting you on trail 227).
- That’ll go about another mile until you reach trail 100 where you will turn right again and that’ll take you back to the parking lot.
This will make the hike about 5 miles long and a bit harder than the original. It’s still scenic and you’ll also get some nice views of Red River Gorge. Keep in mind that the way I showed you to do this trail is the clockwise option, and you can also do this the counterclockwise way too.
6) Reaching the top of Grays Arch (optional trail):
This is one of the side trails I checked out when I visited Gray’s Arch. To get there, you’ll also start on the same trailhead and work your way down to Grays Arch, but about 1/4 mile before you actually get to it (the wooden stairs), you will see a trail fork (it’s kind of difficult to see) to your right. You’ll make that right and it’ll have you steadily move away from the main trail until you reach a short climbing rock section (it’s not that difficult), but once you pass it, you’ll come across a flat rock area which is the top of Grays Arch.
Getting back from that area will also involve climbing back up that rock area, heading back to the main trail and continuing either to the bottom of Gray’s Arch or back to the trailhead and I would recommend you go with at least one more person for this side trail so you don’t get stuck in the climbing area (it’s unlikely but this is better for safety).
7) Here’s a Grays Arch trail map (with all 3 options of exploring it):
This is a screenshot from Alltrails (the green is the main one):
Related stuff to see like Grays Arch:

With all of this said, I hope this simple guide to exploring Grays Arch helps you out not just in regards to seeing it exclusively but also the other spots within the Red River Gorge vicinity and other states that have these types of places.